BackAgain/2000 Server Edition version 3.0 - A Review, Part II
Introduction
Last month
we began our review of BackAgain/2000 Server Edition v 3.0 (henceforth called simply,
"BackAgain") by examining some of its features compared with BackAgain/2000
WorkStation Edition, and some of the new features in this version. Then we looked
at the documentation, installation, and configuration of the product. We will begin
this part of the review by examining the actual backup procedure.
Main BackAgain/2000 Screen
-
Note: for this and the other screenshots in this article,
clicking on the image will usually enlarge it; clicking on browser "Back"
button will return to this page.
-
Double-click on BackAgain object to start the program.
TIP: If you are backing up a LAN, make sure that all computers having files you
want backed up are ready and online before you start BackAgain. This will
ensure all files will be found when BackAgain starts.
-
File Menu
-
Left-click on the File menu.
-
Click on the Backup item.
-
Note: Left-clicking on the Backup Button has the effect as both of the steps
above.
-
Main Backup Screen
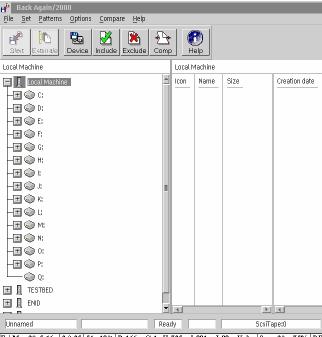
Note: Wait until "Ready" appears in the third
window of the status line at the bottom of the screen before proceeding. While "Wait"
is displayed, BackAgain is scanning the Network for available computers.
-
Backup Main Menu
-
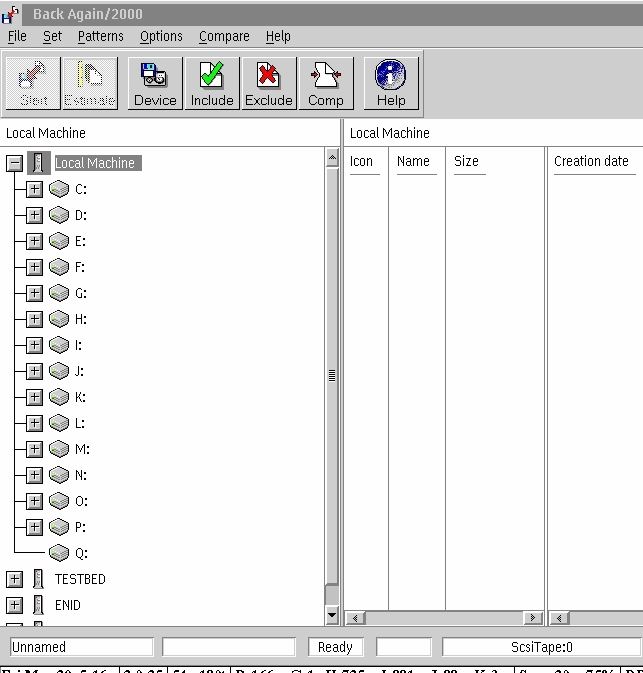
File Selection Screen
-
To begin the backup process, we must first select some files. Normally this is done
using the GUI interface shown above, although backups can also be initiated using
the command line and REXX programs. See the PDF manual for further information.
-
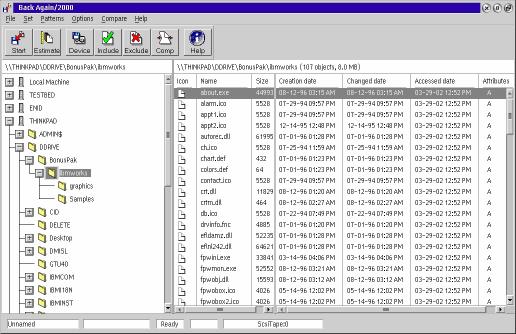
If you wish to backup a complete machine, left-click on the + button next
to the machine's icon, right-click on the resulting pop-up menu, and left-click
on "All volumes". Note that all the folders in the tree are now marked
with a green check mark.
-
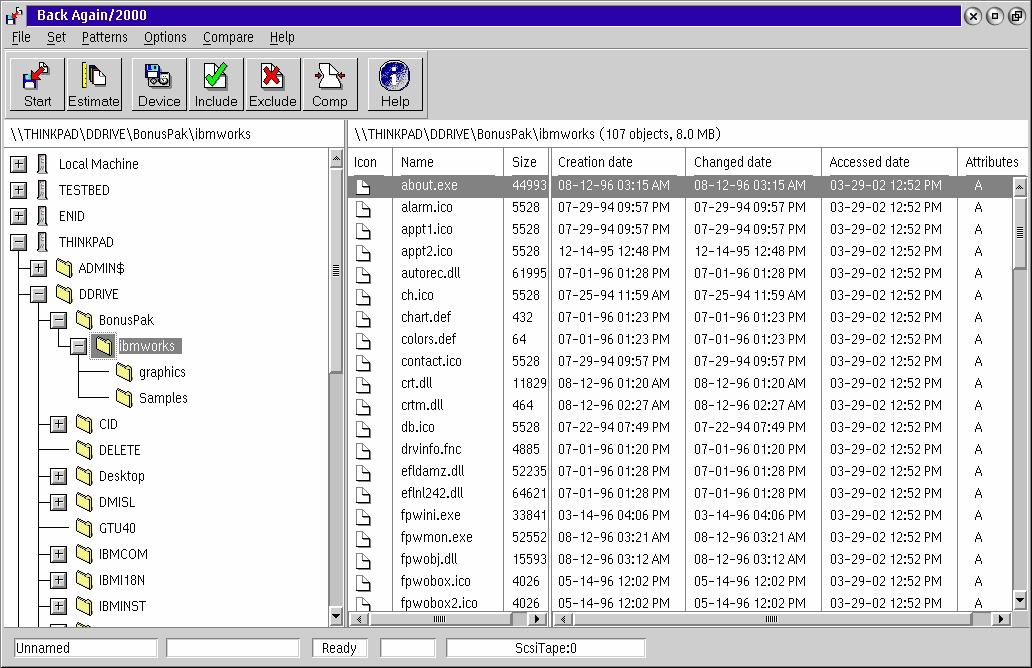
The example in the screenshot shows that it is possible to work through the tree
and display all files in a lower-level directory, and display a list of all files
in that directory. Then you may select just a few files you actually want to save.
-
This shows one aspect of BackAgain's great flexibility. With a single command, you
can do either a complete backup of an entire network or a single file from
one hard drive!
-
Pop-up Menus
-
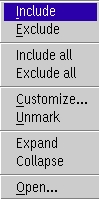
There are two styles of pop-up menus in the left-hand (tree) window:
-
Pop-up menus for machine icons. These contain five items:
-
Include all volumes. Clicking on this causes all drives (and directories and files)
on this machine to be selected.
-
Exclude all volumes. Clicking on this causes all drives on this machine to be omitted
from the backup.
-
Unmark all volumes. Clicking on this removes all selection markings (both Include
and Exclude) from all drives on this machine.
-
Expand.
-
Pop-up menus for drive and folder icons.
-
Include. Clicking here selects all files in the top level of the drive or
folder. Subdirectories and their files are not selected. (Recursion is turned OFF.)
-
Exclude. Clicking here will omit all files in the top level of the drive
or folder. Subdirectories and their files are not affected. (Recursion is turned
OFF.)
-
Include all. Clicking here selects all files and subdirectories in the drive
or folder. (Recursion is turned ON.)
-
Exclude all. Clicking here deselects all files and subdirectories in the
drive or folder. (Recursion is turned ON.)
-
Custom. Clicking here opens another box which allows the user to enter additional
information regarding dates and attributes to further specify which files shall
be backed up. (Only available if some selections have already been made in the drive
or folder.)
-
Unmark. Clicking here removes all selection markings (both Include and Exclude
types) from all files and subdirectories in the drive or folder. (Only available
if some selections have already been made in drive or folder.)
-
Expand. Clicking here expands all directories and subdirectories (i.e. the
complete tree) contained in the driver or folder. However, no files are selected
for backup.
-
Collapse. Clicking here reverses the effect of the Expand as stated
above.
-
Open. Clicking here opens a Workplace Shell window containing a tree view
of the drive or directory.
-
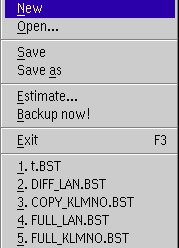
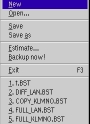
File Menu
-
Click on "File".
-
Click on "Save". If a "Save as" has not been performed at least
once on the current SET, then this command is equivalent to a "Save as".
Otherwise it saves the current SET file using the current name.
-
Click on "Save as". This will open a File Save Combo box. Enter desired
filename, including ".BST" extension, and make sure directory is "SET".
Click on "OK" to close the window, and return to the menu.
-
Clicking on "New" will allow you to create another x.BST or SET file.
(It will give you the opportunity to save your current SET file if you have changed
it.)
-
Clicking on "Open" displays a list of all files in your SET directory,
and gives you the opportunity to select one to use in a Backup operation.
-
If desired, click on "Estimate...". This will open a box and automatically
cause the computer to calculate the number of files selected and estimated size
of the backup. (The size may not take into account any compression, especially hardware
compression done by the drive.)
-
Clicking on "Backup Now!" will initiate the backup immediately. However,
it is generally a good idea to review the settings available from the Main Menu
before initiating the Backup to avoid any surprises once the Backup has started!.
-
Clicking on "Exit" terminates BackAgain/2000, properly closing down all
files.
-
Note: At the bottom of the File Menu, numbered 1., 2.,... are the most recent *.BST
(SET) files used in BackAgain/2000. Single-left-clicking one of these is a short-cut
method of opening it.
Note: Some of the settings found hereafter duplicate settings found in the
Configuration setup. In these cases, the settings here override those made
in the Configuration setup for this session only.
-
Set Menu
-
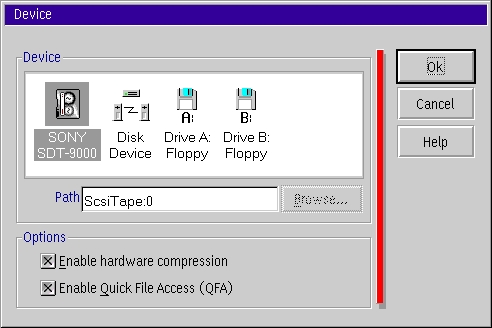
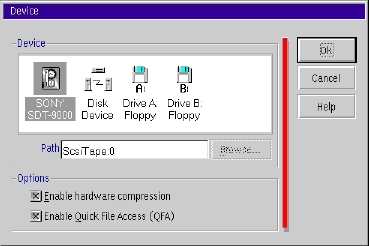
Device - Opens the "Device" window shown above, which allows you
to select the desired backup device.
-
Note: If you wish to back up to a CD-R or CD-RW device, then select "Disk
Device" in the window. This will "un-grey" the Browse button; now
enter the device letter assigned to the CD-R(W) device by the CD writer software.
-
Note: In addition to the device types shown above in the "Devices"
window, BackAgain/2000 will back up to ATAPI
tape drives and tape libraries (autoloaders). My system is not equipped with
either of these devices and so these are not displayed.
-
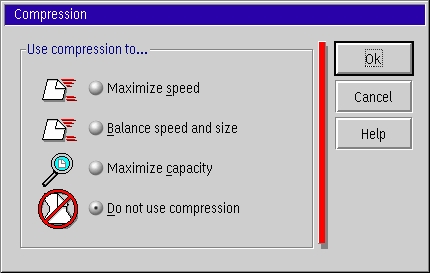
Compression - Opens "Compression" window shown above, which allows
you to select the desired compression. You should check the user's manual for your
backup device before selecting a setting, because certain devices will restrict
what settings you can use. For example, some DAT drives contain a hardware compression
feature and specify that you NOT select software compression. If there are no such
restrictions, then you can choose whichever settings you want based on whether backup
drive space or time is more important to you. For a complete description of the
compression algorithms used, click on the "Help" button.
-
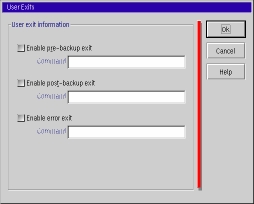
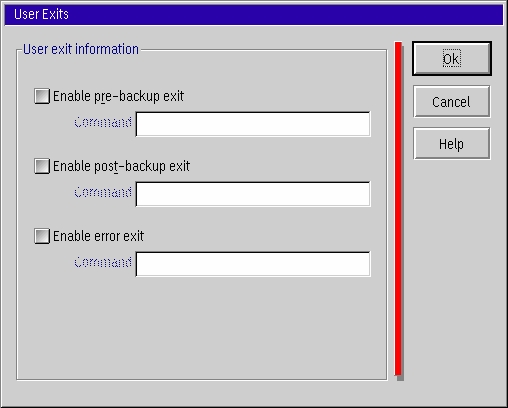
User Exit - This allows advanced users to insert programs (usually Rexx)
at specific points during the Backup/2000 processing to further control the overall
backup operations. The points at which a user program may intervene during a backup
are:
-
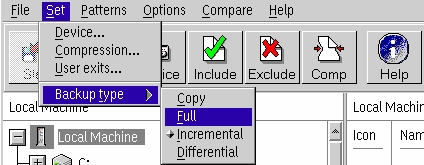
Backup Type - Opens a window that allows you to choose the type of backup
you want: Full, Copy, Incremental, or Differential. Here is a brief description
of each of these types:
-
Pattern Menu

-
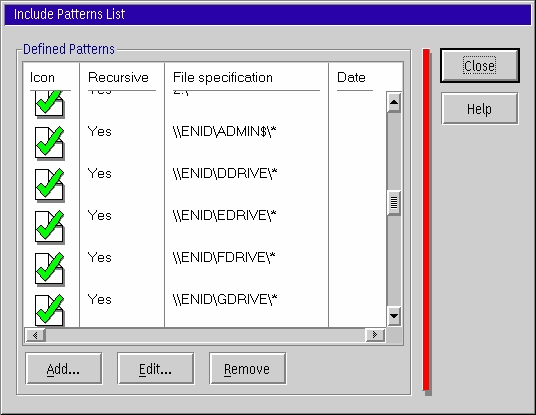
Essentially the Pattern Menu is simply another way of entering the file selections
described in Paragraph 4b - File Selection Screen. The major advantage of entering
selections here is that it is possible to enter selections on computers that for
one reason or another do not appear on the File Selection Screen.
-
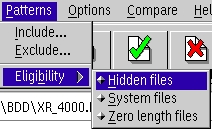
Note that the "Eligibility" submenu gives you complete control over what
to do with special files--those that are hidden, zero-length, or those that have
been designated as "system".
-
Options Menu
The Options menu is really an an assortment of backup controls that do not readily
fit elsewhere. However they can be grouped into four categories:
-
Archive/Catalog handling.
-
Move to Archive - All successfully backed up files are deleted from the hard
drive.
-
Do not save catalog - This will prevent BackAgain/2000 from saving a list
of backed up files in the backup library (on the hard drive). A list will still
be stored on the backup media, so that it can be recovered later.
-
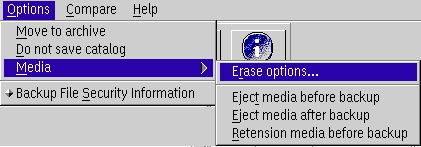
Media settings.
-
Eject media before/after backup - For those devices capable of being unloaded
by the system (i.e. under program control), e.g. CD-RW disks, this function will
be performed if the corresponding option is selected.
-
Retension media before backup - A retension does a "fast-forward"
to the end of the tape and then rewinds it. This helps straighten out kinks or irregular
spots that may be in the tape. This is a good idea as an error preventative measure
whenever you use a tape that hasn't been used in a long time. In addition some tape
drives will require retensions if a tape has been used several times.
-
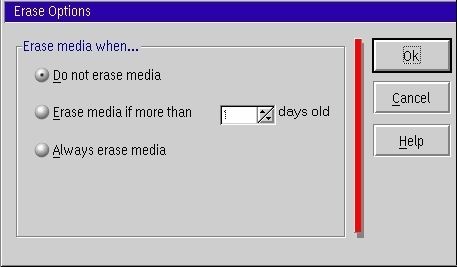
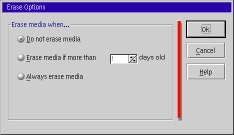
Erase Options
In this box you are given the choice of never erasing a tape, erasing after a
specified number of days, or always erasing a tape. In my opinion you should always
leave this set to "Never erase a tape" and choose to erase or not erase
a tape on a session by session basis. Either of the other two options present too
great a risk of deleting files you don't intend to sometime in the future. Once
again, that's my opinion.
-
Backup File Security Information
When selected, BackAgain/2000 will backup HPFS386 and JFS security information
for each file and directory backed up. When backing up FAT or HPFS partitions, this
option has no effect. This option should be enabled whenever a complete system backup
is performed. (Server Edition only).
-
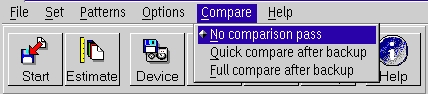
Compare Menu
-
No comparison pass - In previous years, some kind of validation was essential
after performing a backup. However modern hardware has become so reliable that in
most situations it is not necessary to do a comparison pass. This is especially
true if your backup procedure incorporates some redundancy - e.g. by using differential
backups.
-
Quick compare after backup - This option causes a second pass during which
the data written is checked for readability. No comparison with the data on the
disk drive is made.
-
Full compare after backup - This options causes a second pass during which
the data written to the backup media is compared with the data on the disk to verify
that they are identical.
This brings to the end of the GUI Backup section of BackAgain/2000. In all likelihood
this is by far the most commonly used portion of BackAgain/2000 by most users. I
hope that this review has given you a good feel for how this program works, and
that you have picked up a few pointers while reading it. Next month I shall look
at the Restore process, as well as the Emergency or Disaster Recovery procedure
as well. Please join me then.
[Feature Index]
editor@os2voice.org
[Previous Page] [Newsletter Index] [Next Page]
VOICE Home Page: http://www.os2voice.org