BackAgain/2000 Server Edition version 3.0 - A Review, Part 5
Note: This article is based on an earlier
article on the same topic written by the author for About.com.
However, the content has been substantially revised and updated.
Introduction
After several months of looking at relatively straight-forward BackAgain/2000
operations, we are ready to examine an area where BackAgain/2000, especially the
Server Edition, manifests some of its real power: backing up a complete LAN with
one command.
-
The Backup Cycle consists of a single Full Backup
of the LAN plus a series of Differential Backups.
-
Typically the Full Backup is run at night, once every two weeks to a month, depending
on your needs and your tape inventory. It's important that all PC's be online to
OS/2 when this is run so you need to either check the PC's yourself or appoint someone
else to do it. Making signs asking people not to touch the machines during this
time may help as well, especially if you have night-owls around.
-
The Differential Backup should be run nightly (or more often if required.) This
can be run safely along with a minimal amount of network activity.
-
Preparing a Set of Backup Media.
-
Before beginning your backup cycle, you need to prepare a set of labelled tapes
(or alternative media. See Figure 1 below for a summary of the wide variety of backup
devices supported by BackAgain/2000 for OS/2). You need two sets (sometimes called
father-son) at the very least. Personally I don't feel safe unless I have at least
three sets (grandfather-father-son), and I'm much more comfortable with four.
Supported Backup Devices
|
Floppy Drives
|
SCSI Hard Drives (local & remote)
|
Tape Drives (Travan, DAT, DLT, etc.)
|
|
Local ATAPI Hard Drives
|
USB Hard Drives (1.1 & 2.0)
|
Tape Changer Systems (aka libraries)**
|
|
Remote ATAPI Hard Drives
|
Writeable CDR Drives (CDR/W)*
|
CDR/W Changers (Jukeboxes)**
|
|
Jazz Drives
|
Zip drives
|
Figure 1.
Notes:
-
Drives marked * required either CDS's IFS bundle or CD-Writer for OS/2 from RSJ.
-
Drives marked ** require the additional CDS product: Back Again/2000 Autoloader Support Module
-
The number of tapes in each set will depend on how big and how many disk drives
you have and on which tape technology you are using: e.g. TRAVAN, 8mm, DAT, etc.
-
A new technology has come onto the market recently--one with which you may want
to experiment if you have a large disk file base to manage. I am referring to the
Ultra-large IDE hard drives. Some of these monster-disks boast as much as 200 gigabytes
with an 8 MB on line cache! These drives are available at a reasonable price.¹ (In addition some manufacturers are putting
USB interfaces and external cases on them.) Such a drive holds far more data than
any tape or collection of tapes within the budget of any SOHO user.
-
It is also worth noting that the upcoming version of BackAgain/2000 for OS/2 v.
4 to be released in the spring of 2003 will no longer have the 2 GB maximum file
limitation found in current versions of BackAgain/2000, making BackAgain/2000 v4.0
a perfect tool for backing up onto these huge drives.
-
You should give some thought on where you want to store the Differential Backups.
The setup described in this article appends them to the end of the Full Backup,
continuing onto other tapes as necessary. This minimizes the number of tapes required.
However some people prefer to keep the Full Backup on tape(s) by itself and keep
the Differential Backups on a different set of tapes completely. Still another approach
would be to put the full backups on CDR's, since CDR's have much more capacity than
most tapes, and then put the differentials on tapes.
-
Starting the Backup Cycle
-
Make sure all PC's on the network that you wish to back up are online to OS/2-eCS,
are idle, and will be left idle for a sufficient time to complete the backup.
-
Close all applications except any required to support your network, such
as InJoy Firewall.
-
Make sure all PC's on the network have the shares defined for the drives you wish
backed up and that they are on line. If you wish to verify which PC's are online
you can type the following command from any OS/2 command prompt:
NET VIEW
This will return a list of all the computers the local PC can see. If one of
the network computers you wish to back up is missing, try shutting it down, powering
it off for a few seconds, turning it back on and restarting OS/2. If that fails,
further investigation is required, and you may have to skip that PC for now.
Trap: The Configuration | Preferences
| Drives option "Scan neighboring servers" is very useful--so much
so that I always leave it checked. However if this option is selected and you want
to backup a remote workstation R from your main system M, do not have M connected
to any drives on R. Otherwise any selected drives will be backed up twice.
-
Open the BackAgain/2000 folder and then open the Sets folder;
-
Drag-and-drop the FULL_LAN icon on top of the BackAgain/2000 program icon in the
parent folder.
-
When the main BackAgain/2000 Workstation window appears, click on "Start".
-
When the Change Volume window appears, insert the first volume of one of your tape
sets in the drive.
-
Make sure the "erase media" box is checked, and click on "OK".
-
The Backup will now start and run until all files on the Network have been backed
up.
-
Creating SET Files.
SET files are a crucial part of BackAgain/2000's operational philosophy, so it
is appropriate to pause here and review how to create them.
-
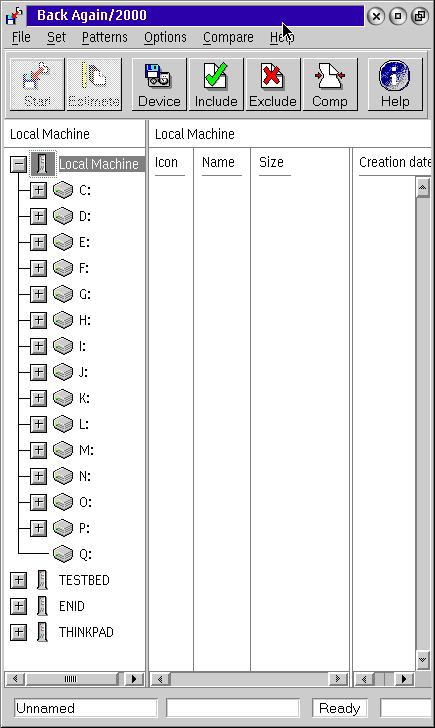
Start BackAgain/2000, and click on the Backup button. This will open the Main Backup
window. After a short pause, a list of the PC's on your LAN will be displayed in
the left window. The current machine will be expanded and all the drives will be
listed. See the screenshot below:
Figure 2. (Click on image to expand to full size.)
-
Wait until the list of PC's has appeared in the left column, and "Ready"
has appeared in the third window of the status line at the bottom before proceeding
further.
-
To create the FULL_LAN set, proceed as follows:
-
Click on Set | Device from the Menu line, and then select the device
to which you are backing up. If necessary, fill out the Path window using the Browse
button. For more details on selecting alternate devices such as CDR's and hard drives,
please see
the second article in this series. Click on Cancel.
-
Click on Set | Compression from the Menu, and choose the desired compression
factor. Note: some tape drives have built-in hardware compression, and in such cases
it may better to set the BackAgain/2000 compression to: "Do not Use Compression".
Eventually, trial and error is the only way to determine what works the best in
your situation.
-
TIP: It may be possible to temporarily disable hardware compression. My system
uses a SONY SDT 9000 SCSI DAT drive, and on selecting the tape drive device, BackAgain/2000
displays a window containing a check box option identified as "Use hardware
compression". This option is selected (ON) by default. I did some testing,
and deselecting the option does make a huge difference in backup speed and time.
Check your system to see if this option is available.
-
Click on Set | Backup Type | Full to request a full backup.
See the chart below for the different types of backups and their characteristics:
Types
of Tape Backups
|
Full
|
All selected files are backed up.
|
|
files marked as backed up.
|
|
Copy
|
All selected files are backed up;
|
|
does not mark files as backed up.
|
|
Differential
|
Backs up only selected files that have changed since last
full backup;
|
|
files not marked as backed up.
|
|
Incremental
|
Backs up selected files that have changed since last full
or incremental backup;
|
|
files marked as backed up.
|
Figure 3.
-
Check the remaining Menu options to make sure they are set the way you want.
-
Finally, click on File | Save As from the Menu, and then enter FULL_LAN.BST.
(Note: the BST extension is not strictly required, but it is still recommended.)
-
Click on Save.
-
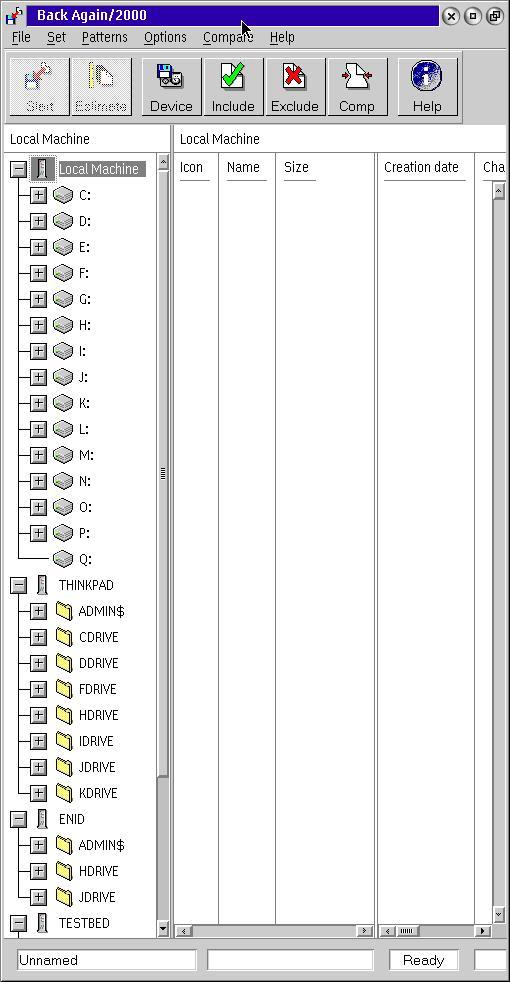
Now it is time to select the Devices and Files to be backed up. Before specifying
Devices, you must expand all of the workstations. To do this, left-click on the
plus sign (+) to the left of each PC in the Main Backup window. See Figure 2. The
result will look something like this:
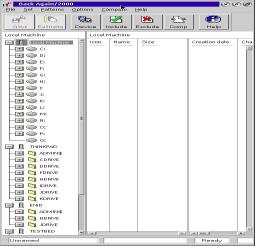
Figure 4. (Click on image to expand to full size.)
-
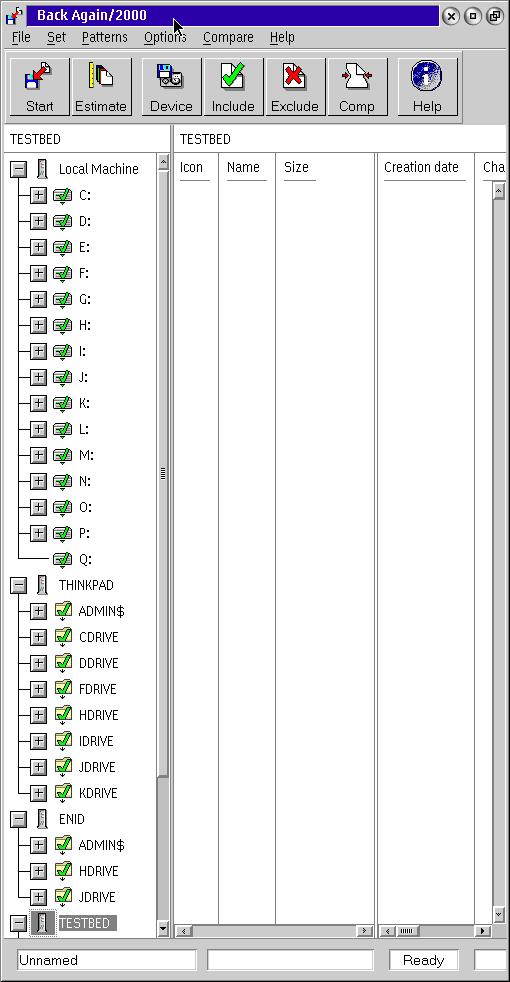
Now right click on the tower icons appearing beside each PC name (or the workstation
name itself), and then select "Include all volumes" from the pop-up menu.
This turns on recursion, and ensures that every file in every subdirectory on every
device on that workstation will be backed up. You should see a green checkmark appear
over each disk folder on the workstation.
-
Repeat the process for each workstation you wish to back up. When you are complete,
the Main Backup screen should look something like this:

Figure 5. (Click on image to expand to full size.)
-
Now verify that the bottom left window of the status line still says "FULL_LAN",
and click on File | Save from the Menu.
-
Creating a Differential Set file (DIFF_LAN) is now very simple.
-
From the Main Backup window, click on File | Open. This brings up
an OS/2 Combo box labelled "Open".
-
From the combo box, select and load the file FULL_LAN you created in the previous
section.
-
Wait until "Ready" appears in the third window of the status line.
-
Click on Set | Backup Type | Differential from the Menu.
-
Click on File | Save as from the Menu. This opens a OS/2 combo box
called Save as.
-
Enter the filename DIFF_LAN.BST in the appropriate window, and then click on "OK".
-
Running the Full Backup.
-
Open the BackAgain/2000 folder, and then open the Sets folder. Drag-and-drop the
FULL_LAN icon on top of the BackAgain/2000 program icon in the parent folder.
-
When the main BackAgain/2000 Workstation window appears, click on "Start".
-
When the Change Volume window appears, make sure the "erase media" box
is NOT checked, and click on "OK".
-
The Backup will now start and run until all the specified files on the network have
been backed up.
-
Running the Differential Backups.
-
The differential backup can be run manually from the main system exactly like the
Full Backup except that DIFF_LAN is used instead of FULL_LAN and "erase media"
must be unchecked instead of checked. (The latter should already be set correctly
from the Set file definition, but it is still a good idea to check.)
-
Differential Backups, however, are usually scheduled by BackAgain/2000 and run automatically.
There are at least two different ways to achieve this.
-
Using the BackAgain/2000 Schedule Folder.
--This appears to be the "normal" method as expected by CDS, and certainly
the cleanest and simplest one.
-
Open SET's folder and open Scheduler Folder.
-
Grab the right edge of the Scheduler Folder, and pull it far enough to reveal the
"Change" button.
-
Drag-and-drop a shadow of DIFF_LAN icon into the Scheduler Folder.
-
Click on the "Change" button.
-
Click on the "Daily" radio button, and select the other options
in that section according to the days you want to run the backups. Note that at
least one day of the week or one short-cut button must be selected.
-
Enter the time (24 hour clock) when you want the backup to run.
-
Check that the BackAgain/2000 Scheduler program is running and that a shadow of
that program is in the Startup folder.
-
Using BackAgain/2000's Internal Scheduler.
-
Open the BackAgain/2000 folder, and start BackAgain/2000.
-
Select Configuration | Scheduler from the Main Menu.
-
Click on the "Add" button.
-
Click on the "Browse" button.
-
From the Open combo box, select DIFF_LAN.BST.
-
Select on "Run backup hidden" according to your preferences.
-
Click on the "Daily" radio button, and select the other options
in that section according to the days you want to run the backups. Note that at
least one day of the week or one short-cut button must be selected.
-
Enter the time (24 hour clock) when you want the backup to run.
-
Click on "OK".
-
Click on "OK" to return to the BackAgain/2000 main screen.
-
Select File | Exit to close BackAgain/2000.
-
Note that you still need to have the BackAgain/2000 Scheduler program running and
a shadow of that program is in the Startup folder.
-
Clearly I would prefer the former method because it is cleaner and simpler to set
up. However, on my system at least, it is not completely reliable. Sometimes the
backup will start on cue every day for months. Then, apparently for no reason it
will just stop. Sometimes reinstalling BackAgain/2000 will get it going again. However
it quit working a few months ago, and reinstalling did not reset the problem. So
I am now using the internal scheduler. In my experience, that method has always
been completely reliable throughout several versions of BackAgain/2000, even including
BackAgain/2.
I realize this could easily be a phenomenon unique to my system, so I am simply
presenting both methods to give you the benefit of my experience, and to give you
a choice in case you run into a similar problem.
That concludes my tutorial on backing up your network, and my series on BackAgain/2000.
If you have any questions, please email me,
and I'll do my best to answer them.
Walter F. Metcalf
¹At the time of writing,
Western Digital
has a 7200 rpm IDE hard drive with 200 GB and an 8 MB online cache for $379.99 at
their online store. Substantial discounts are available at most computer supply
stores.
Disclaimer: All links in this article were checked at
time of writing to ensure validity. However due to the nature of the Internet, some
links may become invalid with the passage of time.
References:
BackAgain/2000, version 3.0
Developer: Computer Data Strategies, Inc.- http://www.cds-inc.com/prodinfo/ba2kos2.html
Price: Workstation Edition: $99.00US, Electronic Delivery: $95.00US Upgrade from v2.1: $79.00US, Electronic Delivery $75.00
Server Edition: $199.00, Electronic Delivery: $195.00
Back Again/2000 Autoloader Support Module (ASM) for Back Again/2000 Server: $199.00, Electronic Delivery: $195.00
The above prices were in effect at the time of writing. For more specific information please contact the developer.
Other links referenced:
Part I of this review - http://www.os2voice.org/VNL/past_issues/VNL0402H/vnewsf5.htm
Part 2 of this review - http://www.os2voice.org/VNL/past_issues/VNL0502H/vnewsf2.htm
Part 3 of this review - http://www.os2voice.org/VNL/past_issues/VNL0702H/vnewsf2.htm
Part 4 of this review - http://www.os2voice.org/VNL/past_issues/VNL0902H/vnewsf5.htm
RSJ CD-Writer for OS/2: https://www.rsj.de/stage/en/order/orderos2.asp
Additional Reading:
Article by this writer showing the importance of backing up.
Backup: Why and How? Part 1 - http://www.wmetcalf.com/OS2_Treasury/Articles/1999/aa082599.html
Backup: Why and How? Part 2 - http://www.wmetcalf.com/OS2_Treasury/Articles/1999/aa090199.html
Series by writer detailing procedure for backing up a LAN.
How to Back Up Your Network, Part 1 - http://www.wmetcalf.com/OS2_Treasury/Articles/2000/aa072600a.html
How to Back Up Your Network, Part 2a - http://www.wmetcalf.com/OS2_Treasury/Articles/2000/aa080200a.html
How to Back Up Your Network, Part 2b - http://www.wmetcalf.com/OS2_Treasury/Articles/2000/aa080200b.html
How to Back Up Your Network, Part 3 - http://www.wmetcalf.com/OS2_Treasury/Articles/2000/aa080900a.html
Excellent article by Hewlett-Packard outlining several backup strategies.
Developing a Backup Strategy - http://www.hp.com/cposupport/information_storage/support_doc/lpg50113.html#P24_4051
|
Walter Metcalf has written many articles on the use and usefulness of OS/2 and eComStation. He was widely known as the Guide for the "About.com OS/2" site until its unfortunate plug pulling. Walter has served as President of VOICE and is currently the Co-ordinator of VOICE's Warp Doctor project http://www.warpdoctor.org. You can read more of Walter's articles in the archives of the VOICE Newsletter and many of his previous os2.about.com articles at his personal web site http://www.wmetcalf.com.
[Feature Index]
editor@os2voice.org
[Previous Page] [Newsletter Index] [Next Page]
VOICE Home Page: http://www.os2voice.org