
VOICE Home Page: http://www.os2voice.org
Newsletter Index
< Previous Page | Next Page >
Feature Index
|
VOICE Home Page: http://www.os2voice.org |
April 2005
Newsletter Index
|
| By Keith Merrington © April 2005 |
When I was at Warpstock Europe, I attended a number of presentations--all of which were interesting--but the one program I saw that aroused my interest due to its efficiency was ClipView. The idea behind the program is very simple, as is often the case with any good idea, namely multiple text clipboards. You might ask, "Do I need more than one clipboard?" which is a good question; I know I do.
Have you ever had the situation where you either have copied one item from one place to another and then a second item only to have to copy the first item again? Have you ever wanted to paste in some standard text which you often use instead of retyping it every time like your email address. If yes, read further; if not, read this anyway as there might be something in it for you.
So what is ClipView? ClipView is a program which allows you to have up to 21 different clipboards to store and retrieve text--and only text--into those clipboards. This is pure text, free of any formatting such as bold, italic, fonts or colour. Not only can you store text into any one of these clipboards but data can be retained between shutdown and startup which makes this program extremely useful.
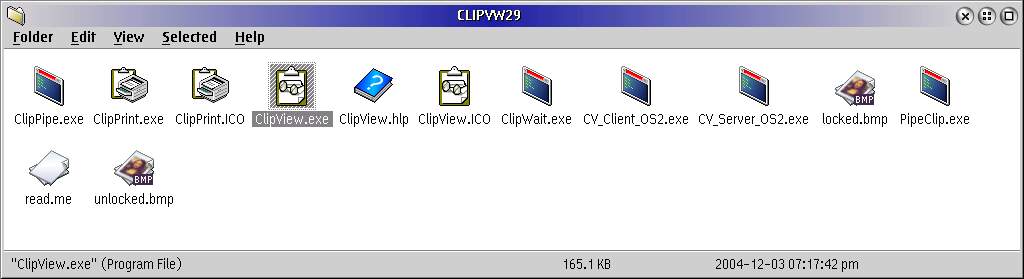
The program comes as a ZIP file which when unzipped into a folder looks like something like this (see Fig 1).
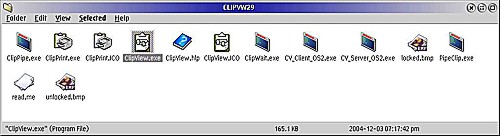
Fig 1 - ClipView 2.9 Folder Contents (Click for larger image)
There is no installation routine as such, so either you add the directory to your PATH statement, or place the files in an existing directory pointed to by your PATH statement. It should be noted that if you are using Warp, you need the EMX runtime DLLs to run these programs. If however you are using eCS, the EMX routines are already installed.
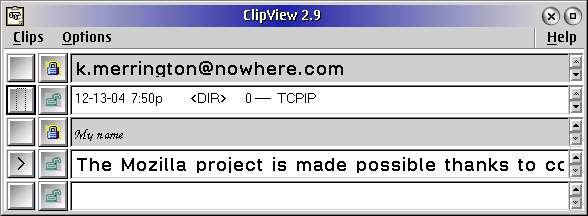
When initially started by double-clicking on the icon ClipView.exe, you see the unimposing entry box as shown below in Fig 2.
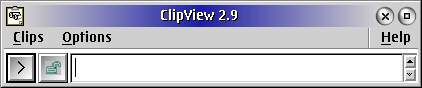
Fig 2 - ClipView Main Screen
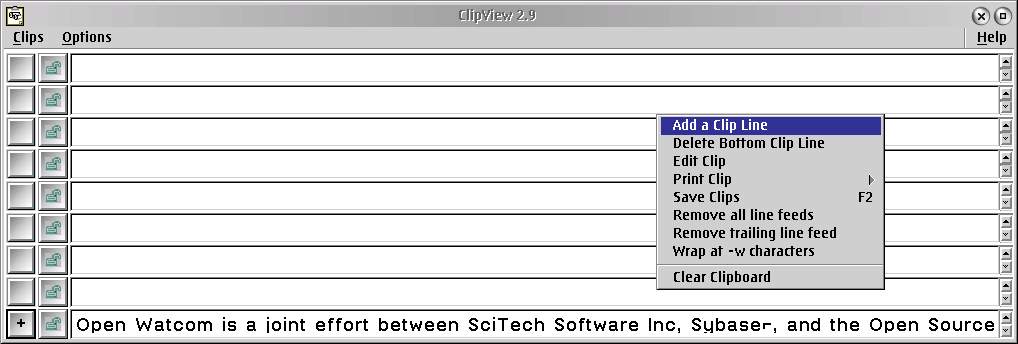
Any text that is already in your clipboard is displayed as is any data that you now copy. By using the RMB (Right Mouse Button [right-handed mouse]), or the menu item Clips, you can add and delete clip lines with a minimum of 1 and a maximum of 21 lines. According to the author the maximum of 21 clip lines was chosen as this fills a screen having a resolution of 800 x 600 pixels, so having more lines didn't make sense. Normally when adding clip lines ClipView grows from the bottom up, which might not be quite what is expected. Now one of the niceties is that if for any reason when adding clip lines the title reaches the top of the screen, the frame is extended downwards keeping all of ClipView visible on the screen.
Text data that goes to your clipboard also goes automatically to the first free clip line of ClipView, This line then becomes the current clip line. After data has been stored the current clip line is indicated by the > symbol on the first pushbutton of the corresponding clip line. If you now do a paste, you only receive data from the current clip line. Any clip line except an empty clip line can be selected as the current clip line. Just select the first pushbutton using the LMB (Left Mouse Button) and the line is selected. When all clip lines are full, the oldest clip line is overwritten unless you lock the clip line. In this way a first-in first-out buffer is maintained.
In the normal course of events if all clip lines are empty, they are filled top to bottom in a round robin fashion. After more clips have been entered than there are clip lines present, the oldest clip is just below the current clip line. However if the clip is edited, the time stamp changes and this tidy order is no longer present. Also if the data of a new clip matches an existing clip, only that clip's time stamp is updated which means that line is replaced and not the oldest. This makes maximum utilization of the available clip lines. Visually nothing has changed except most probably the current line indication. This means that after a while the clip line to which a clip is added may look quite random but it is still first-in first-out!
Again with just one mouse action you can lock and unlock each clip line by clicking on the second pushbutton of the relevant clip line. The padlock on this button changes to a "locked" symbol and the background colour of the clip line is now gray instead of white. This clip line is now excluded from any updating. If you try to lock all available clip lines, you are presented with an error message as otherwise there would be nowhere for a clip to go.
A clip line can sometimes be very long and have more than one line. Multiple lines can be viewed easily by using the vertical scroll buttons shown to the right of each clip line. If it is, however, a long line, one click somewhere on the line allows you to move back and forth and even up and down the line using the cursor keys. (Due to a PM bug if you are using a higher resolution than 800 x 600, you can apparently move the cursor outside of the window area. Move the cursor back, the text is repositioned and your cursor is visible.)
In the same way it is possible to edit a clip line in situ. However if there are more than just a couple of lines or the lines are long, it is sometimes handier to look at the data using a text editor. This can be initiated by selecting the context menu using the RMB of the required clip line and selecting Edit Clip from the menu item. Or even simpler, just double-clicking in the clip line itself. The default editor "e" in Warp, "AE" in eCS, or the editor defined in the environmental variable EDITOR, is started displaying the corresponding clip. The background colour of the clip line in question is changed to grey indicating that it is being edited and the timestamp is updated to make sure that any new clips go other clip lines during the edit. Closing the editor automatically updates the clip line. If you do any copy and pasting from within the editor, these copies also go to the next available clip line. This makes taking a subset of a clip and saving it in a new clip a breeze. If you close ClipView with the editor still open, you are warned by an error message.
It should be noted that although the editor "AE" can handle files larger than 65,534 bytes, it can only copy a maximum of 65,534 characters, so if you try to copy more than this amount, nothing at all is copied.
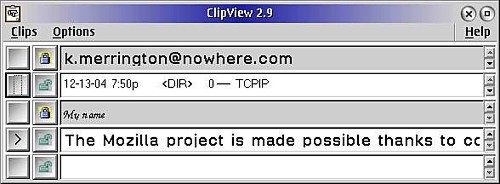
Fig 3 - Locked clip lines (Click for larger image)
Since it is possible to save all data in ClipView when exiting, or even during execution by using the [F2] key (the same Save shortcut as in EPM and AE), you can keep handy data readily available for pasting into any document, such as your email address, a login name, URL, a pathname to your download directory, or whatever you want.
Maybe you have a lot of standard data you need available and locked in and still want to have a lot of free clip lines. You may run multiple copies of Clipview. With this in mind the author has added the possibility to specify different paths and filenames for your saved data so each instance of ClipView can have its own private file. Furthermore you can also switch off copying clipboard data to Clipview so that your "standard data" is in one ClipView and new data only goes to the other one.
The author has even added another helpful item. If you select a clip line in one of the ClipViews, the > indication is either present in both ClipViews pointing to the same data (e.g. you have selected a clip line in the ClipView that had copying clipboard data switched off, and this data is added to the other ClipView as a new clip), or only present in the ClipView which can be updated. You always know at a glance which item you have selected.
These options, like most other options, can be invoked either by startup parameters or by the Options menu. If you look closely at Fig 3, you might think that you can format each clip line. In fact the only difference is that different display fonts were selected by dragging fonts to the clip lines from the Font Palette. Either of the colour palettes can also change the background colour if required. However it is of little practical use since as soon as you use the lock function, the colour is reset.
The Save On Exit function, which is not on by default, can be invoked by using either the start up parameter -a (autosave) or by using the pull down menu Options.
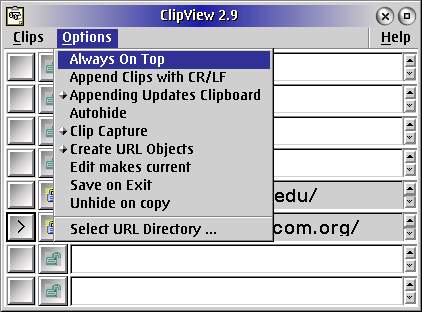
Fig 4 - Options
In the Options pull-down menu you can immediately see and change the state of the current options. Most of these options speak for themselves. Some of these options can be set on startup by using startup parameters. It should be noted that parameters can only be specified by prepending the - (minus sign). The start up options are:
The autosave option saves both the contents of each clip line and the current position of ClipView, but does not any option you have selected. So if you have a preference for which options ClipView should start other than the default options, you need to put the appropriate startup option as listed above in the Parameter field in the properties of ClipView.exe object.
This makes it easy to make ClipView behave the way you prefer. I also like the URL feature which allows me to save all URLs I come across to the desktop, or to a specified location by using the copy and save mechanism of LMB hold and mark, click RMB. This is sometimes preferable to bookmarking and very quick.
Another item which is handy is the append option. Using the RMB on the clip line selection button (this turns the normal > sign to a +) makes all copied data go the the same clip. So if you are scanning an Internet page, you can just copy those interesting details you want easily off of the page. So instead of the usual copy, switch to the editor, paste, switch back to Mozilla, select copy and so on, I just set ClipView to append and now it is just, select, copy, select, copy, until I have everything I want. Afterwards I either use the save clip option of Clipview or go to my editor, paste and save the data to a file.
Now this could result in some very long lines since line formatting is a function of the Web browser and not the editor. This can easily be remedied with another nice feature that was introduced in ClipView version 2.9, namely the automatic wrap function. Using the RMB at the clip line in question opens a context menu allowing me to select wrap at x characters and now line feeds are inserted appropriately. Conversely I can remove all line feeds if I so want. It's really user friendly! If you are copying data from Mozilla you might however want to change your default code page to 850 as otherwise you might get code page conversions occurring and get for example an O with a tilde instead of the Euro symbol.
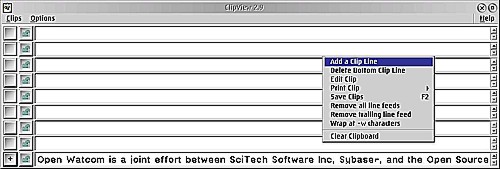
Fig 5 - RMB clip line functions (Click for larger image)
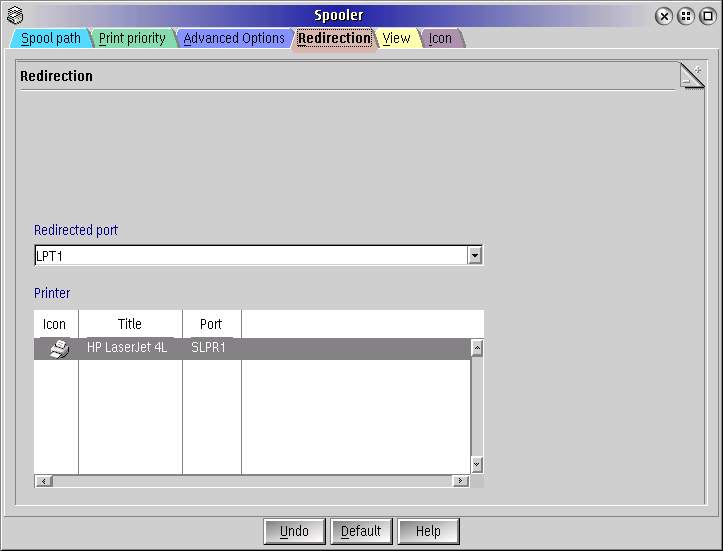
There are 6 other programs included with ClipView which I review below. First is possibly the simplest of them all is ClipPrint which just prints the contents of the clipboard to your printer. Be careful. It automatically prints to LPT1 unless specifically set in its properties notebook to another port using the -p parameter. Of course you can print from within ClipView by using the RMB on the clip line you want and selecting Print Clip. These functions were added since the standard clipboard viewer in Warp or eCs has, strangely enough, no print capability. If you have a printer on a USB or network port, it is a simple matter of using the redirect function in the print spooler properties tab to redirect the standard LPT or COM ports to the appropriate printer as shown in Fig 6.
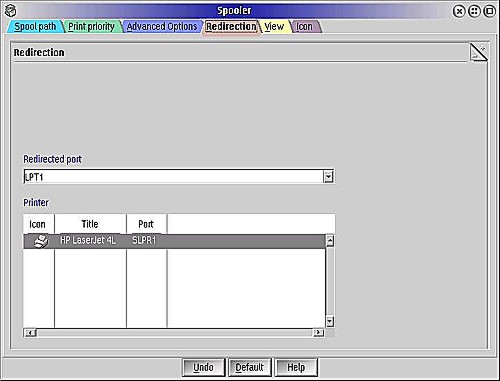
Fig 6 - Printer redirection (Click for larger image)
I ran into a problem with SLPR which passed data to my network printer but either nothing came out, or just a few nonsense characters, or a blank sheet. This bug--which is not related to ClipView--also occurs using the OS/2 command PRINT. I resolved it by changing the default setting in SLPR of LPRPORTD to compatible mode. When I reported his phenomena to the author of ClipView he promptly updated the help file accordingly!
For people who like to use the command line, scripts and REXX you will be pleased to know that there are a number of very nice commands all part and parcel of the ClipView suite. To put and retrieve data from a pipe there are ClipPipe and PipeClip. To put input from a clip to a pipe you use ClipPipe and to receive from a pipe and put in a clip you use PipeClip. This makes it possible to directly store the output from a process in the clipboard or ClipView itself. For example, if I need to find a file I created on January the first on drive D, I could use the following command:
dir d:\ /s | find "1-01-05"
However, if there are a lot of files created on this date, the result probably scrolls off of the screen. Now I could redirect the output to a file but it's simpler when I have ClipView running to just send the data to the clipboard:
dir d:\ /s | find "1-01-05" | PipeClip
Now I can look in the Clip and see where the file is.
An associated program which allows an action or command to be executed after data is entered to the clipboard is ClipWait.
In Warp 4 and eCS there is Network DDE (NWDDE.EXE) which allows sharing local clipboards across the network. In Warp it is highly unlikely that you've noticed this command--I never did--as you would have to look in the directory \IBMLAN\NETPROG, although if you are using eCS you might have noticed it in the folder Network Utilities in the desktop folder Local Network. If you only want text and don't want a PM program, Network DDE pales in comparison to ClipView for ease of use. Unlike Network DDE Clipview uses two different programs to build up the communication. They are: CV_Server_OS2 and CV_Client_OS2.
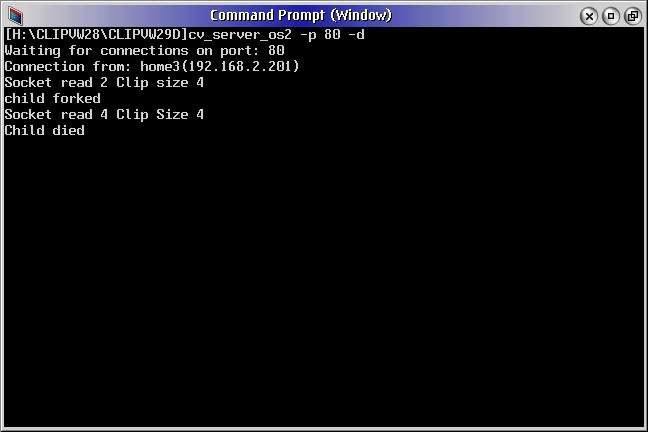
Although they use the network directly like Network DDE, they do not require that Peer services have been started. First start CV_Server_OS2 and indicate with the parameter -p which port number is for communication. Once started, CV_Server_OS2 continually receives data until terminated (e.g. by [Ctrl-C]) displaying only one text line: "Waiting for connections on port: xx". You can only see if information has been receiving by looking at ClipView or the clipboard for new data. Alternatively you can use the undocumented switch -d which gives information for every clip received stating the origin of the clip and its size (see Fig 7).

Fig 7 - Clipview Server (Click for larger image)
On the Client side, both the server and port number need to be specified. Execution is terminated after sending the contents of the current clip line. So if you constantly wish to send the clipboard contents, you need to create a small command file to call CV_Client_OS2 every time the clipboard is updated. It is also possible to send via the same port data in both directions. This requires a server running on each system and obviously data should be sent automatically in one direction only, as otherwise data continually circles between the two systems.
To see how good these two alpha programs were, I bombarded the server, a 2.6 GHz [intel] Celeron laptop, from two clients, both AMDs, one a AMD64 running at 2GHz and the other an Athlon at 1.7GHz. I used multiple instances of CV_Client_OS2 on the AMDs with the clipboard being updated by scripts sending rapidly as possible. It worked perfectly. This doesn't mean, however, that you will never lose information which could occur if, for example, your clipboard gets updated faster than the data can be sent. In my case a single connection was somewhat less than half a second. Normally the clipboard is being updated by hand and for all practical purposes this problem will never occur.
This freeware suite gives me additional tools in using the clipboard effectively and even more importantly very simply. The program is well thought through with nice and easy one button operations, uses where appropriate standard OS/2 conventions such as [F2] for save. Although I did find a few minor bugs when testing some actions in somewhat unorthodox ways, the program is extremely stable. In addition, the help file is detailed, includes a "Known Problems" section, and last but not least the program is well maintained by the author (Dave Saville) who is extremely responsive to suggestions and even the sort of bugs that I find.
Although not released as yet, a Windows version of both the Client and Server utilities are in the making which should make this suite even more versatile and communicative.
References:
|
Feature Index
editor@os2voice.org
< Previous Page | Newsletter Index | Next Page >
VOICE Home Page: http://www.os2voice.org