


 Feature articles

Active GUI element
Static GUI element
Code
WPS object
File/Path
Command line
Entry-field content
[Key combination]
Installing VBox/2, Fedora 8 as Guest OS, and Java 6 in Fedora 8
Introduction
This article documents my experiences with installing VBox/2 in eComstation, followed by Fedora 8 as the guest operating system, and finally Java 6 in Fedora 8. The reason for this is because I need a working installation of Java for my work. I do have SVista but its performance is just so slow with Java that it is barely usable. Fortunately, with Paul Smedley's (and also unofficial builds from Innotek by dmik. See Dmik's private build) successful port of VBox/2, I can at least see if Java 6 can work better in VBox/2 than in SVista.
So, why did I choose Fedora 8 rather than, say, Windows XP? Well, for one thing, I do not have a full non-OEM copy of Windows XP and have no intention of supporting M$ with my money and so Linux is the option I chose. I have had good experiences with RedHat and so I chose Fedora 8, the free version of RedHat, as the guest operating system. There is a slight complication when installing Java 6 in Fedora 8 because Fedora comes with IcedTea and not Sun's version of Java. For completeness I also document my installation of Java in this article.
So now, here goes.
My Setup
I'm installed VBox/2 on a P4 3.2 GHz machine with 2 GB of installed memory and eComstation 1.15 (Note: not 1.2). My hard drives are formatted HPFS on my d: drive and JFS on my f: drive. For video, I'm using SNAP full edition at 1280x1024 resolution.
I also have InJoy 3.0 firewall with NAT enabled. This seems to have had no effect on the installation and configuration of VBox/2 with NAT.
Installing VBox/2 and Fedora 8
First download the latest version of VBox/2 from either Paul Smedley or Dmik and the latest version of VBox guest additions, v1.5.6. For Fedora the latest version is here: Fedora 8 i386 DVD ISO distribution.
Just unzip the Virtual Box ZIP file to a directory of your choice. I installed mine in d:/vbox which is a HPFS partition. Then edit CONFIG.SYS so that it loads the driver VBoxDrv.sys:
DEVICE=d:\vbox\VBoxDrv.sys
and then reboot.
Next, I created a 10 GB disk image on a JFS partition which I called fedora8.dvi. The command to do this is:
d:\vbox\vditool new fedora8.vdi 10000
Now I can install Fedora with the following command which shows that I've set aside 256 MB of memory for VBox/2, boot from the Fedora image file Fedora-8-i386-DVD.iso and enabled NAT in VBox/2.
d:\vbox\vboxBFE -m 256 -hda fedora8.vdi -cdrom Fedora-8-i386-DVD.iso -boot d -natdev1
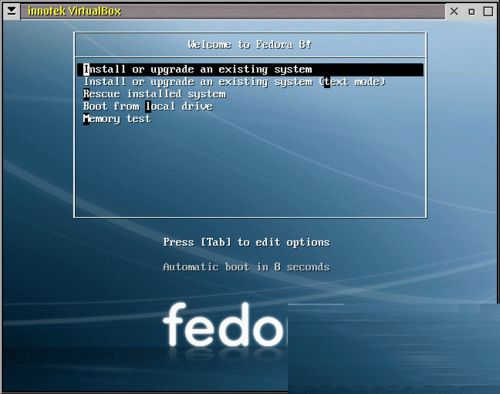
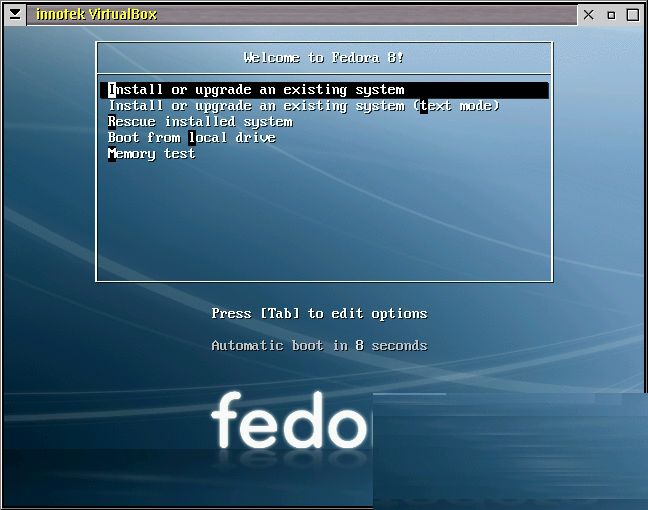
The Fedora Installation screen (Larger image)
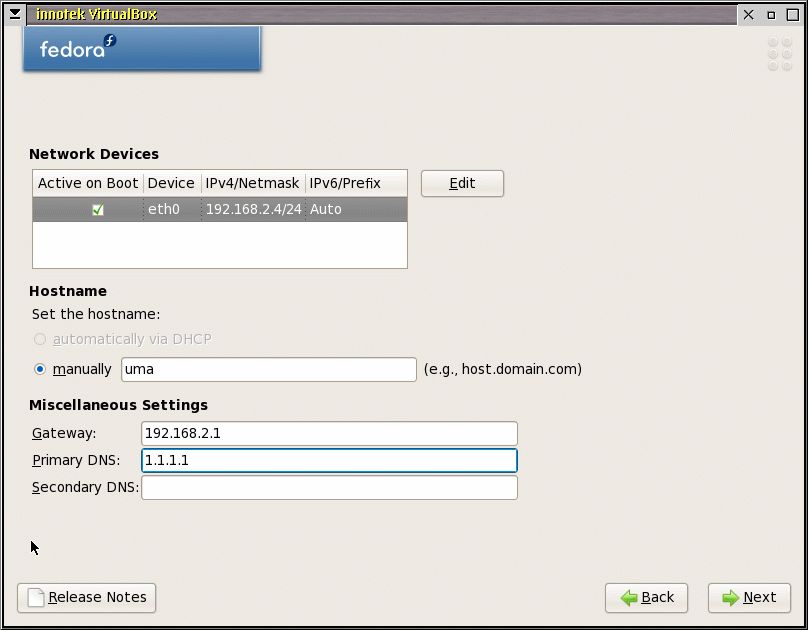
Select Install or upgrade an existing system at the prompt. After answering a few install questions like timezone, superuser password, etc., Fedora starts its installation process. For installation of networking, in my experience, I had to give a dummy local IP or else Fedora would not boot in Phase 2.

I entered a fake local IP address and netmask to get Fedora past the next reboot phase (Larger image)
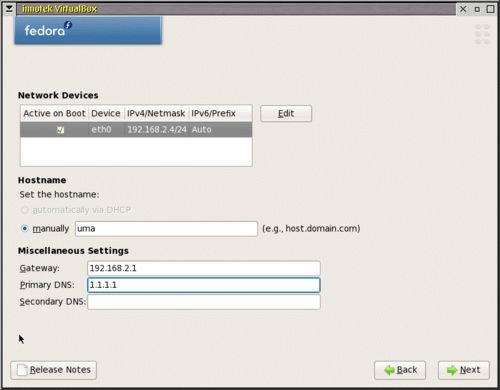
Also required is a fake nameserver and gateway (Larger image)
Next, select “Software Development” when the panel pops up because these tools are needed to install the VBOX/2 additions for LINUX.
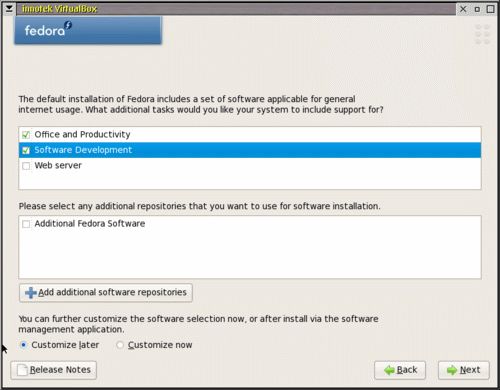
Select software development now, or else you'll have to install it later. (Larger image)
Once phase 1 is done (which actually takes a while because over 1000 packages are installed) Fedora install reboots. But because the original command booted from the ISO file, this reboot fails. This is OK.
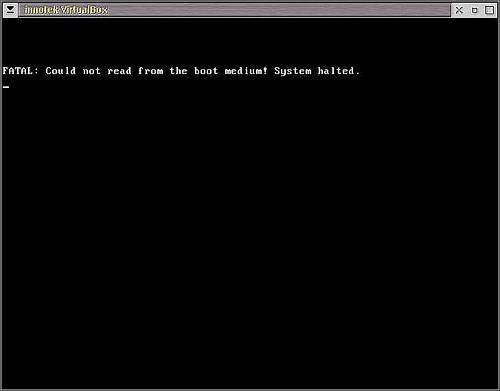
Fedora install fails to reboot after the first phase because it doesn't find a hard disk
Just boot from the VDI file with the following command
d:\vbox\vboxBFE -m 256 -hda fedora8.vdi -boot c -natdev1
and phase 2 starts. Note that the -boot option has been changed to c.
Once phase 2 is done, I get to the Fedora desktop at a resolution of 800x600.
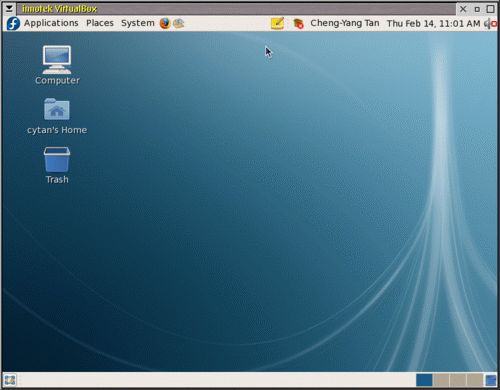
The Fedora desktop at 800x600 (Larger image)
Unfortunately, at this point there is no functioning network. (The section Enabling Networking describes how I got it working).
VBox/2 additions have to be installed to get a higher screen resolution, shared folders, and seamless mouse mode (i.e., no need for the right [Ctrl] button to get the focus back to the eComstation desktop). Rather than continuing to use the SDL version of VBox/2, I reboot Fedora with the Qt version of VBox/2 which is much easier to use.
Rebooting Fedora 8 with the Qt version of VBox/2
To boot the Qt version of VBox/2, the following environment variable must be set in CONFIG.SYS which tells VBox/2 where to place its configuration files. For simplicity, I have set it to point to the root of my d: drive
SET VBOX_USER_HOME=d:\
Either reboot with the CONFIG.SYS edited with the above set, or set it at a command line and then run the next command in the same command line window to start the Qt version of VBox/2:
cd d:\vbox
virtualbox
The Qt version of VBox/2 starts up.
The VBox/2 Qt version (Larger image)
Clicking on New and VBox/2 starts the virtual machine creation wizard.
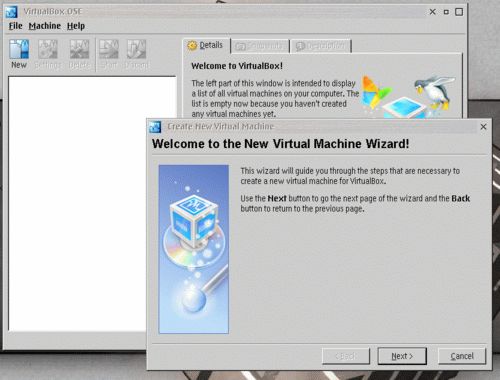
The creation wizard (Larger image)
The next screen allows me to name the machine, choose the operating system type,

Setting up a new virtual machine (Larger image)
and point to the VDI disk which I had created earlier.
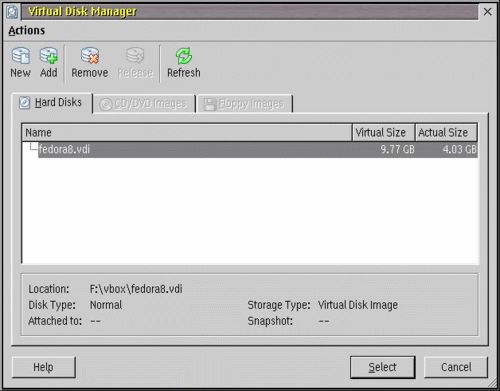
The vdi disk of the virtual machine (Larger image)
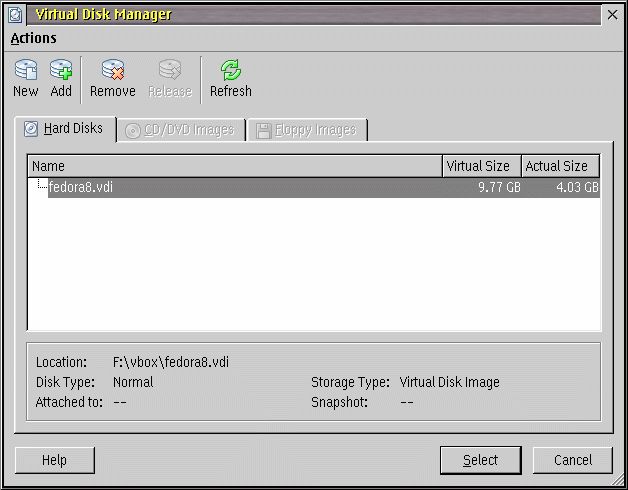
When it's done, here are the parameters of my virtual machine fedora8:
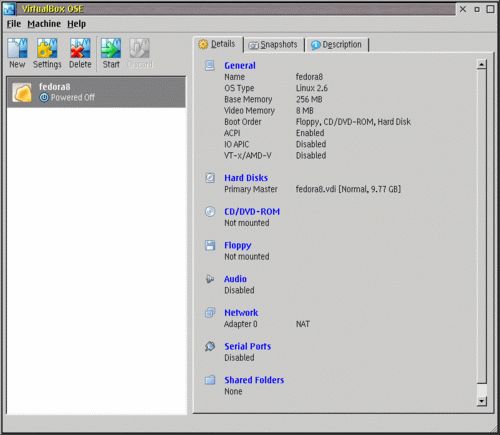
Parameters of my fedora8 virtual machine (Larger image)
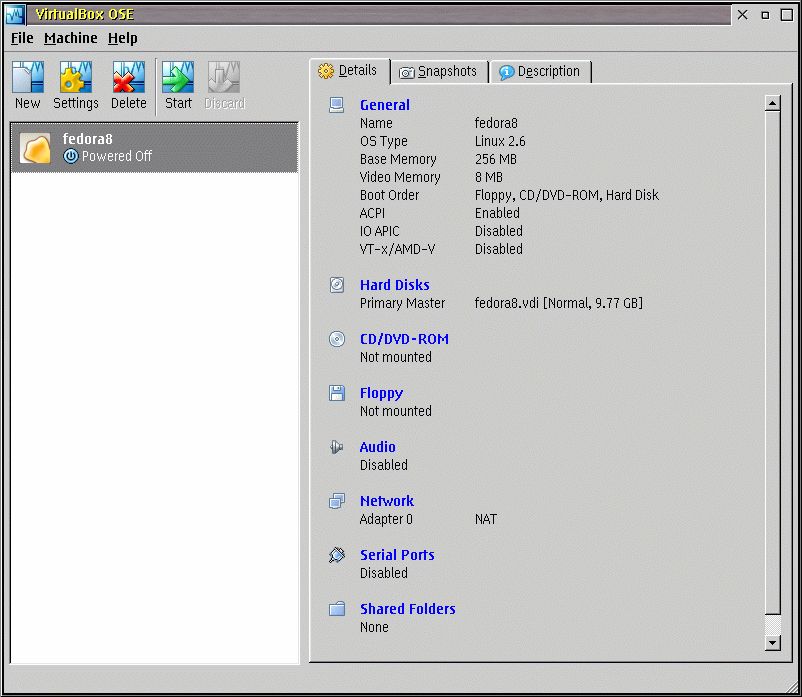
Clicking on Start starts the fedora8 virtual machine. When the virtual machine boots, there are video colour depth warnings which I have chosen to ignore:
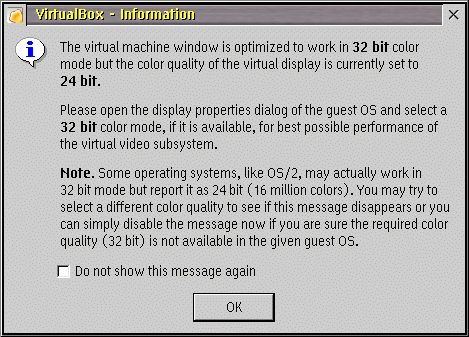
Here's VBox/2 complaining about video colour depth. I'm ignoring this warning
Enabling Networking
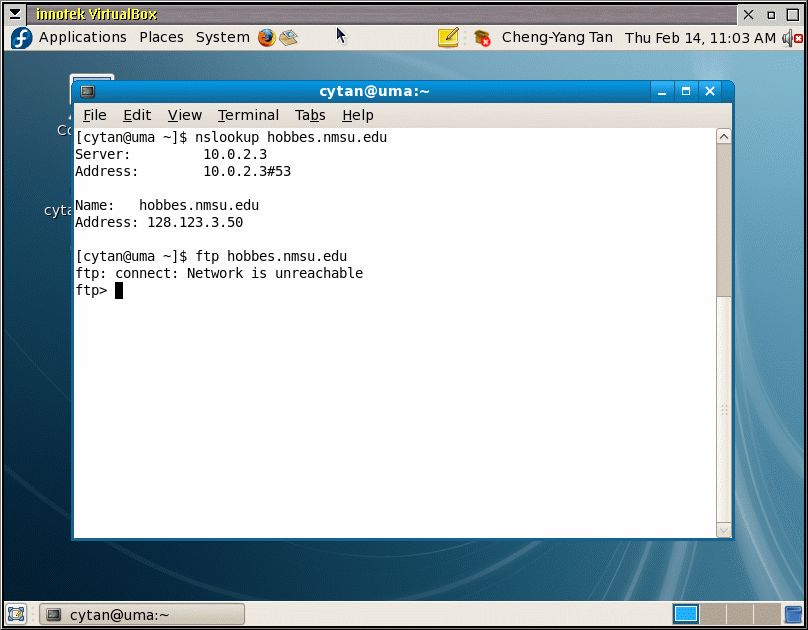
For some reason, Fedora networking does not work when first installed. Shown below is a quick check of the nameserver. Fedora clearly knows about the IP address of hobbes.nmsu.edu. However, when I try to open an FTP connection to Hobbes, it just results in an unreachable error.
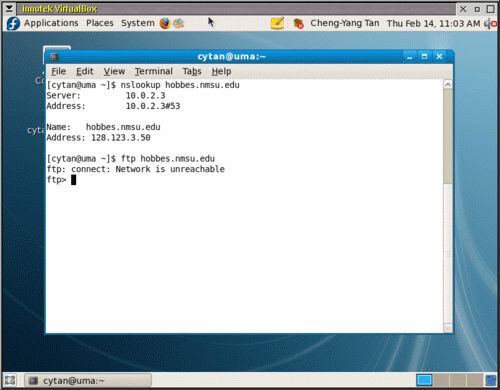
Network packets do not seem to be routed although the nameserver is working. (Larger image)
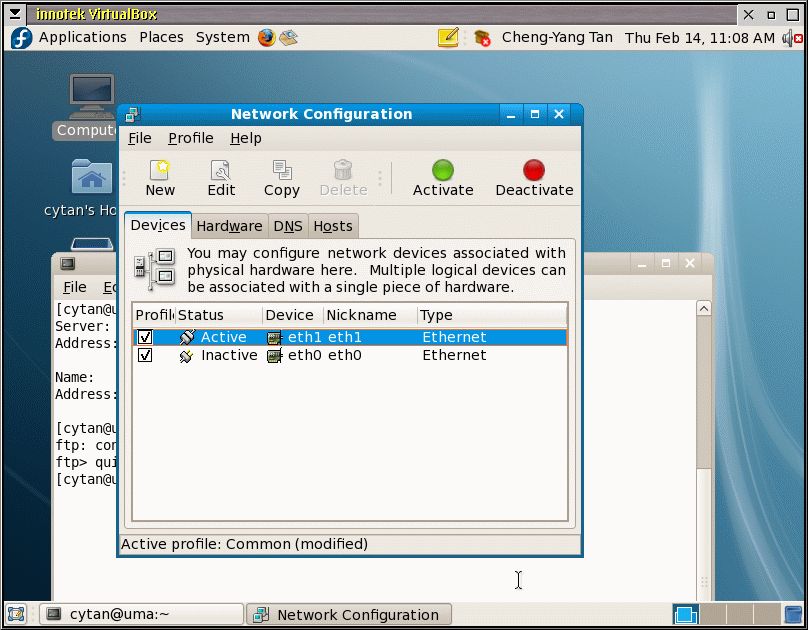
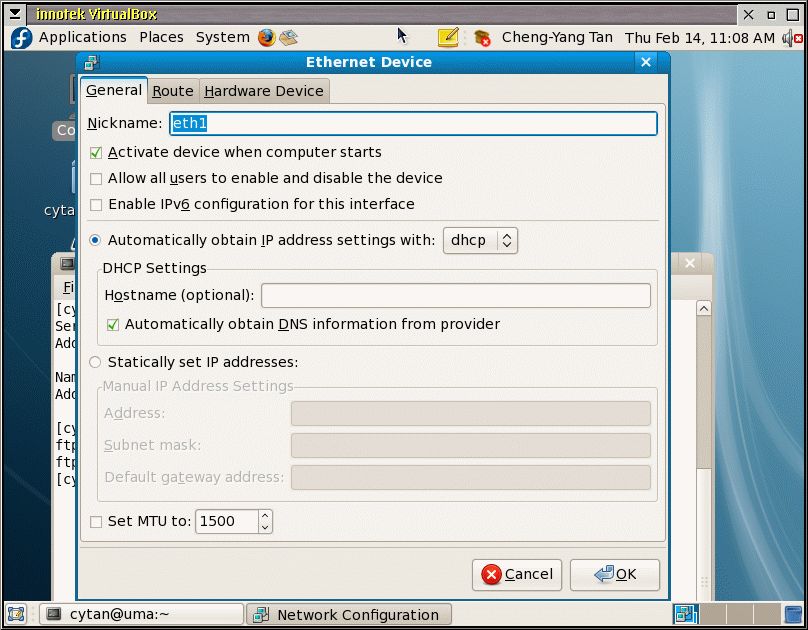
To enable networking, I had to deactivate and then reactivate eth1. This panel shown below is found by clicking System > Administration > Network Configuration on the toolbar.
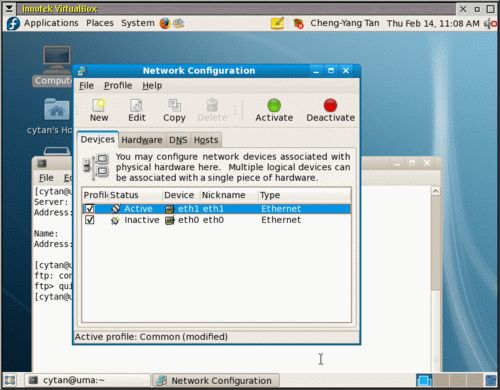
To enable networking eth1 has to be deactivated and then reactivated (Larger image)
Double click on eth1 and make sure it has the following settings:
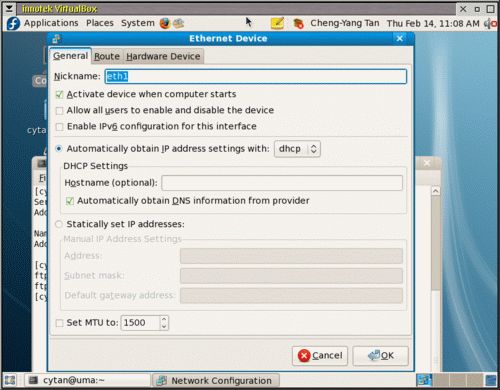
The eth1 settings (Larger image)
Once I do this, routing now magically works and I can see Hobbes!
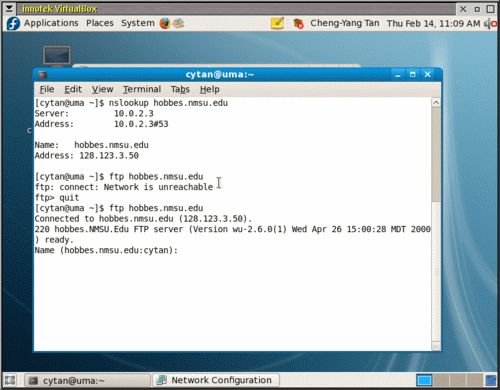
Wow! I have networking! (Larger image)
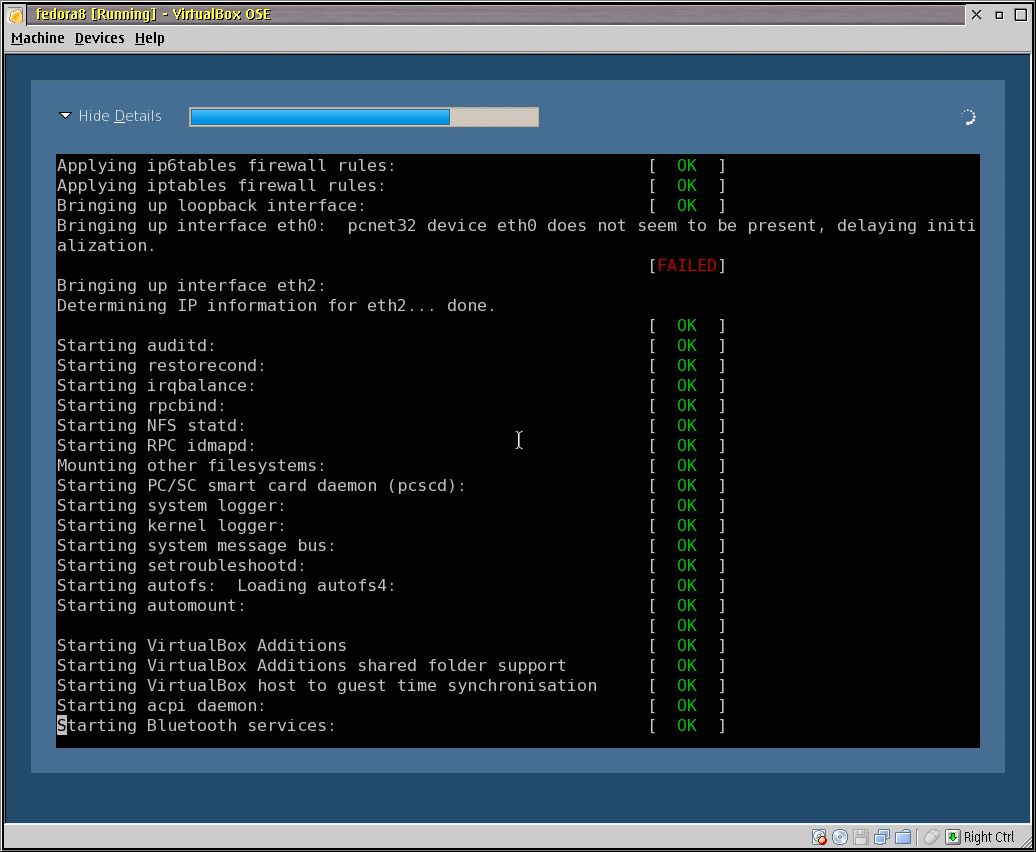
But there is a cosmetic problem at boot up because Fedora complains that it cannot see eth0. But Fedora does see an ethernet interface eth2 which I did not enable or configure. Strange! This really no big deal so I have chosen to ignore it.
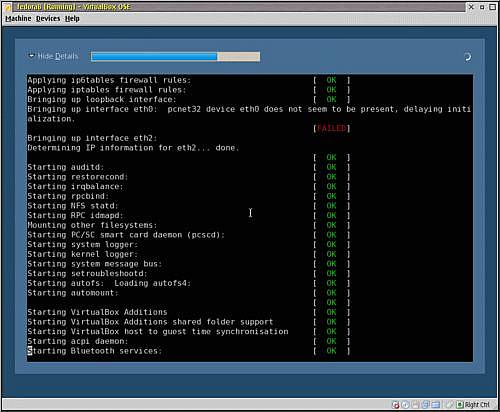
There is a cosmetic message about the absence of eth0 when Fedora boots (Larger image)
Loading VBox/2 Guest Additions for LINUX
Now, I can install the VBox/2 additions for LINUX which enables higher screen resolutions, seamless mouse operation, and shared folders. The first thing to do is to move the additions ISO file which I have downloaded earlier to the VBox directory. (Note that the downloaded file was renamed.)
move VBoxGuestAdditions_1.5.6.iso d:\vbox\virtualbox\VBoxGuestAdditions.iso
Now I can mount the additions ISO by using the pulldown:
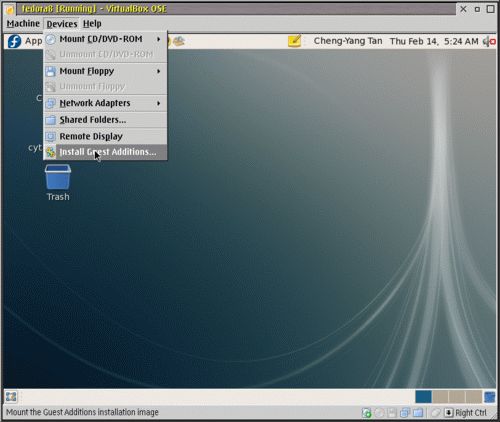
The guest additions are simply loaded by telling VBox/2 to do it with this menu option (Larger image)
After a bit of disk churning, the VBox/2 Guest Additions drive appears on the desktop
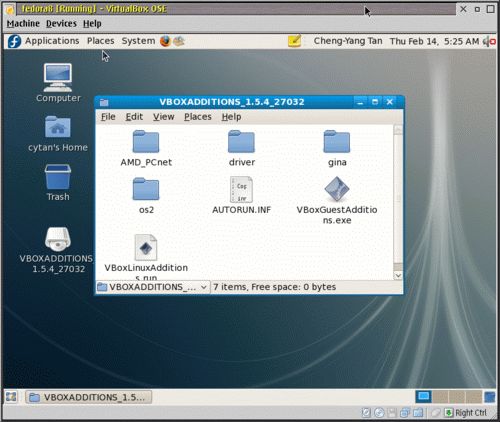
VBox/2 guest additions on the desktop (Larger image)
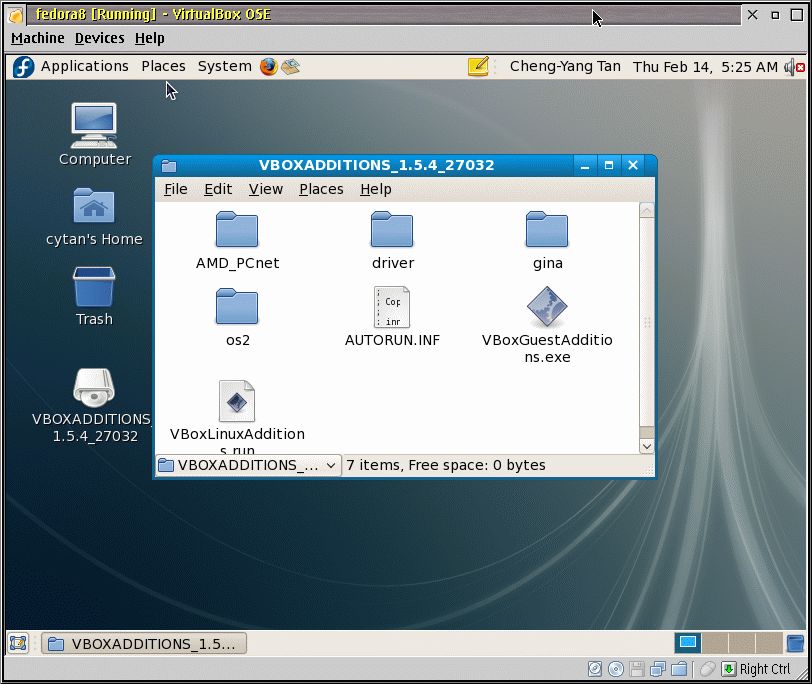
Open up a terminal window and do the following:
cd /media/VBOXADDITIONS_1.5.4_27032/
Then become the superuser and run the LINUX script for installing the additions:
su
sh VBoxLinuxAdditions.run
After a few minutes, the guest additions have installed completely.
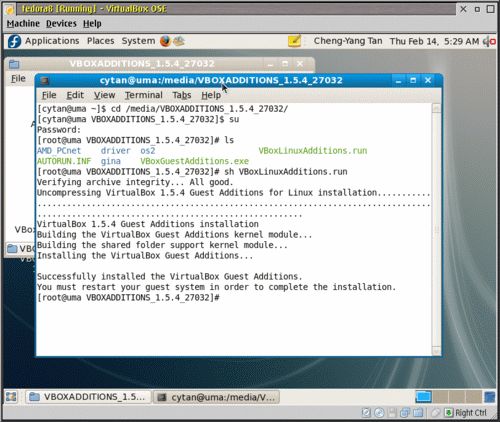
Installing the guest additions (Larger image)
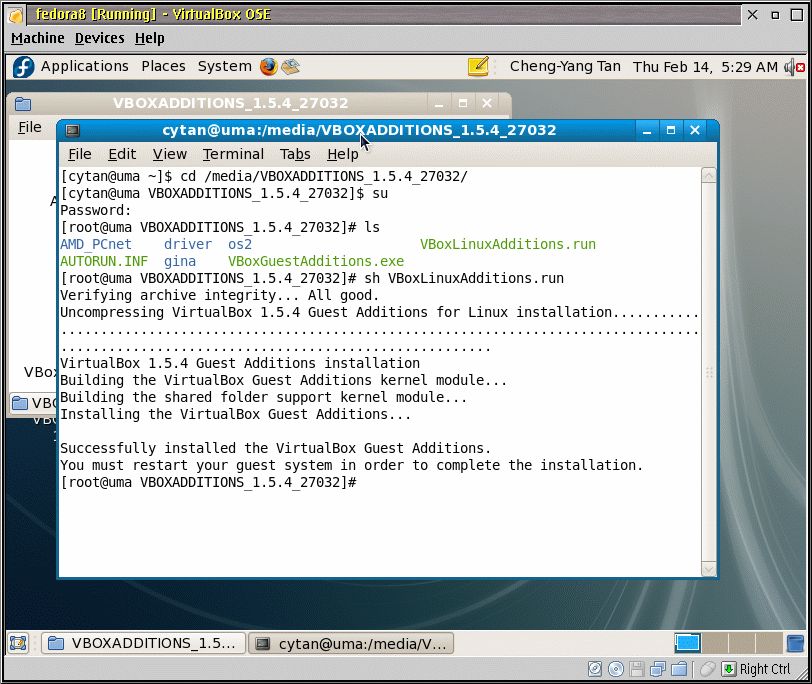
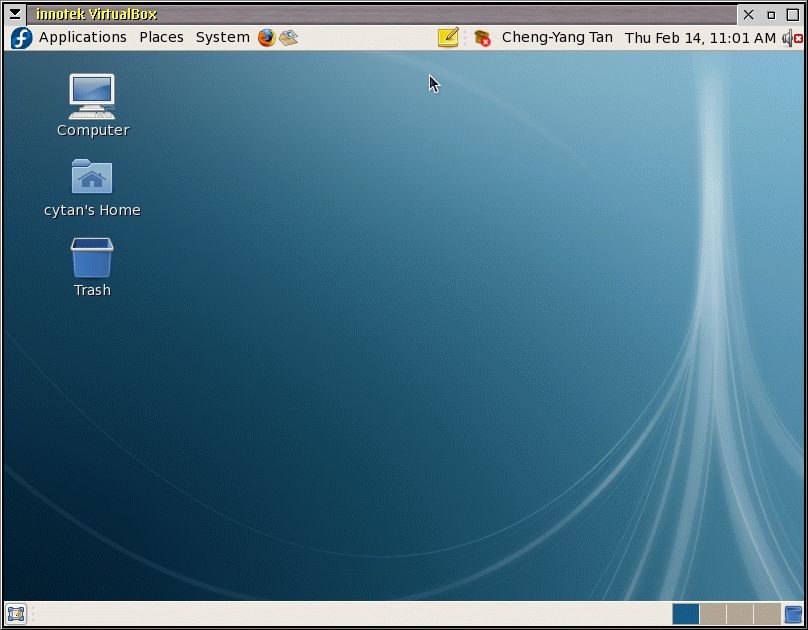
Reboot Fedora and seamless mouse should work now. The screen resolution can now be set to 1024x768 using System > Administration > Display.

Increasing the screen resolution to 1024x768 (Larger image)
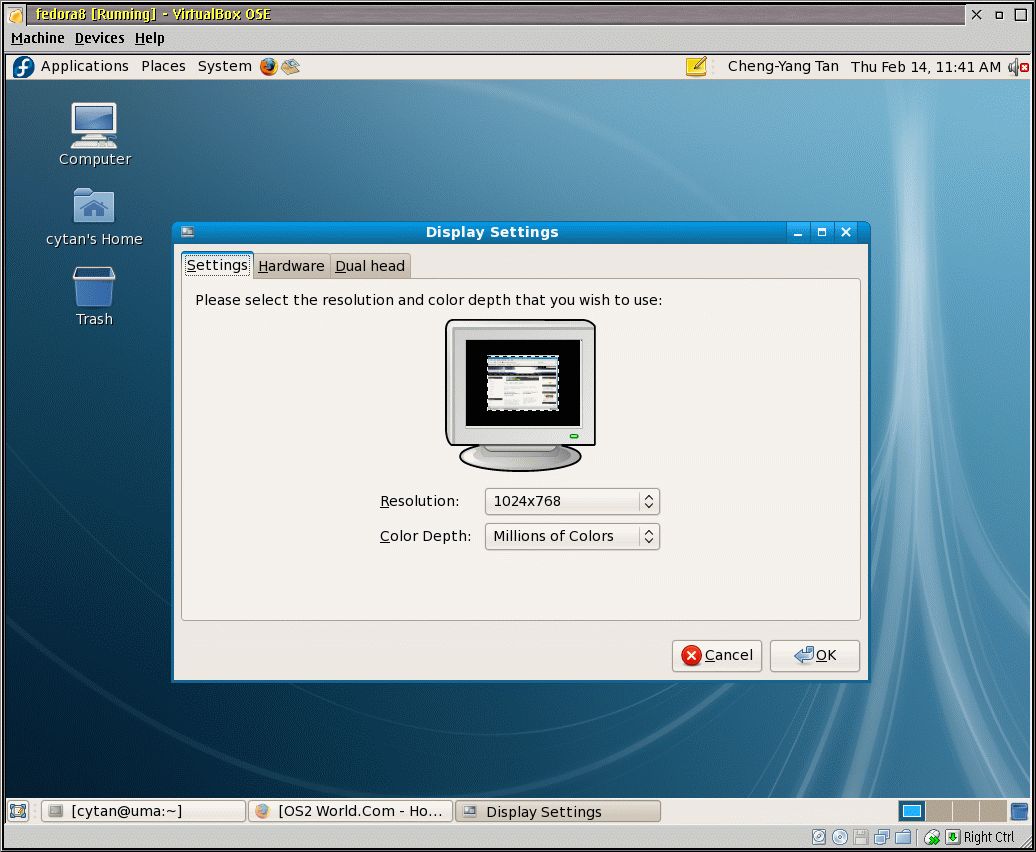
Installing shared folders
Now I have to enable file sharing between Fedora and eComstation. Again the Qt GUI makes this easy. Just pull down the Devices menu:

Installing shared folders (Larger image)
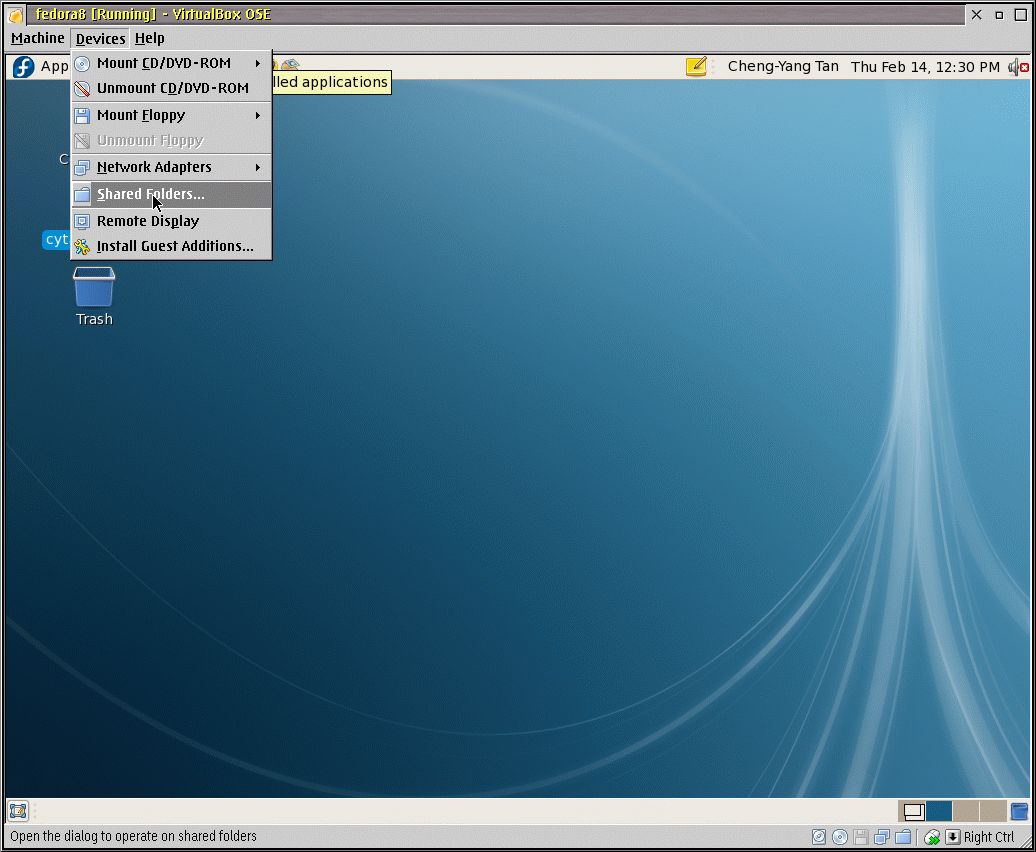
I selected a folder called f:/share for sharing and called it myshare. (I did not call it share because it'll confuse Fedora when I try to mount it in Fedora.)
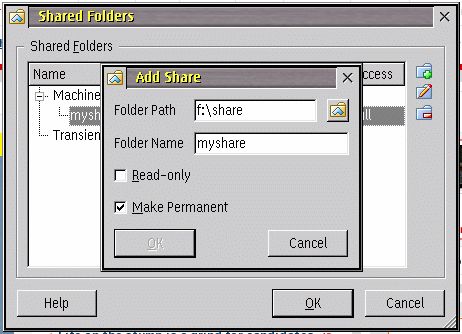
I am sharing f:/share with Fedora
And VBox/2 confirms that I've done it right:
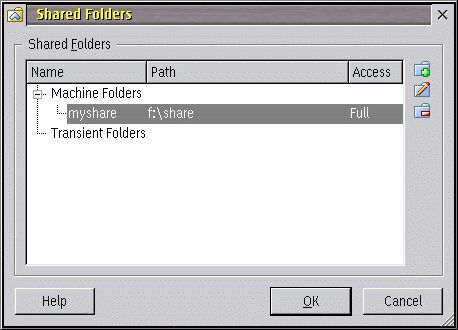
This confirms that VBox/2 sees the share
In Fedora's terminal, I issue the following commands to get it to see myshare:
First I become the superuser
su --login
Second, I make a directory that is shared with eComstation:
mkdir /mnt/share
Finally, /mnt/share becomes the shared directory
mount -t vboxsf myshare /mnt/share
Installing Java 1.6
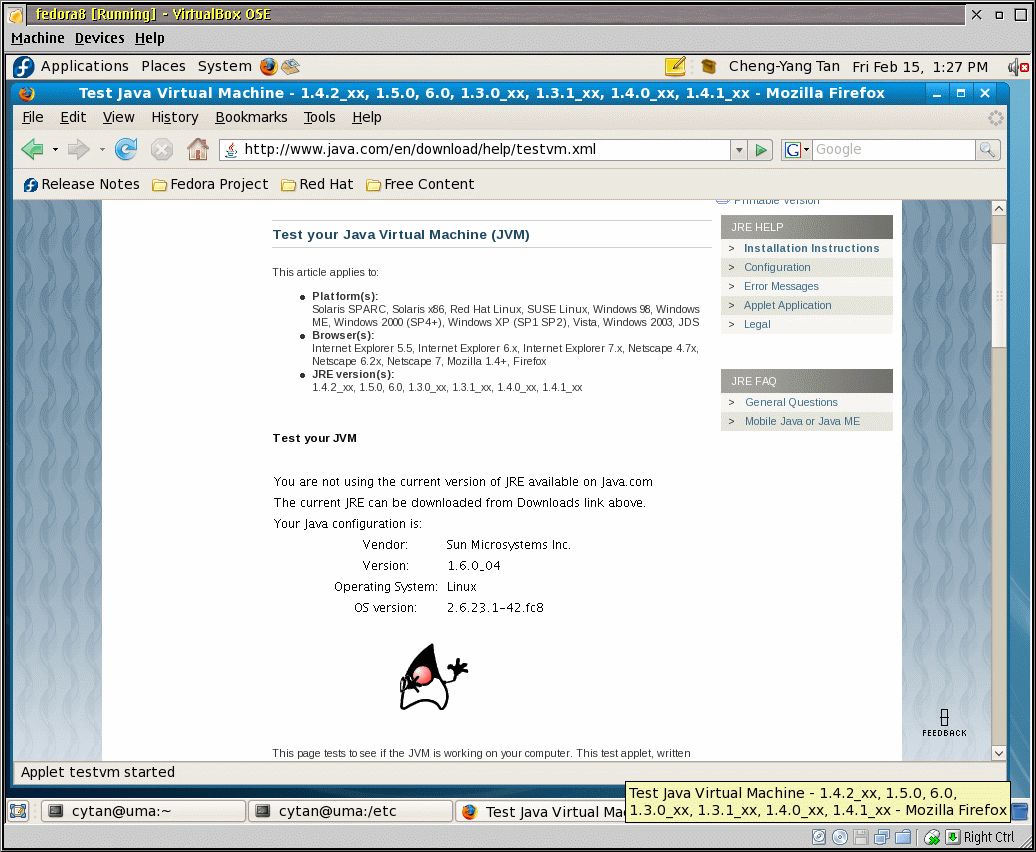
For me the whole point of installing VBox/2 and Fedora 8 is to have Java 1.6. Unfortunately Fedora 8 comes preinstalled with IcedTea rather than Sun's JVM, so it gets a little complicated to get Java going. To install it, I followed the instructions on the page Installing Sun JVM in Fedora 8. The funky thing is that for some reason the Fedora install did not export the plugin path for Firefox and so I needed to add a file (as superuser) called mozilla.sh in /etc/profile:
export MOZ_PLUGIN_PATH=/usr/lib/mozilla/plugins
Rebooting Fedora gets the required plugin path for Firefox and when I go to the link Test your Java Virtual Machine (JVM) provided by Sun, the JVM works as required.
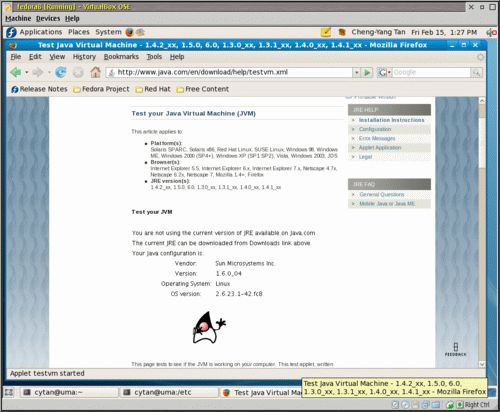
Java 1.6 running happily in Firefox as a plug-in. Doesn't look like it's the latest version, but good enough! (Larger image)
Conclusion
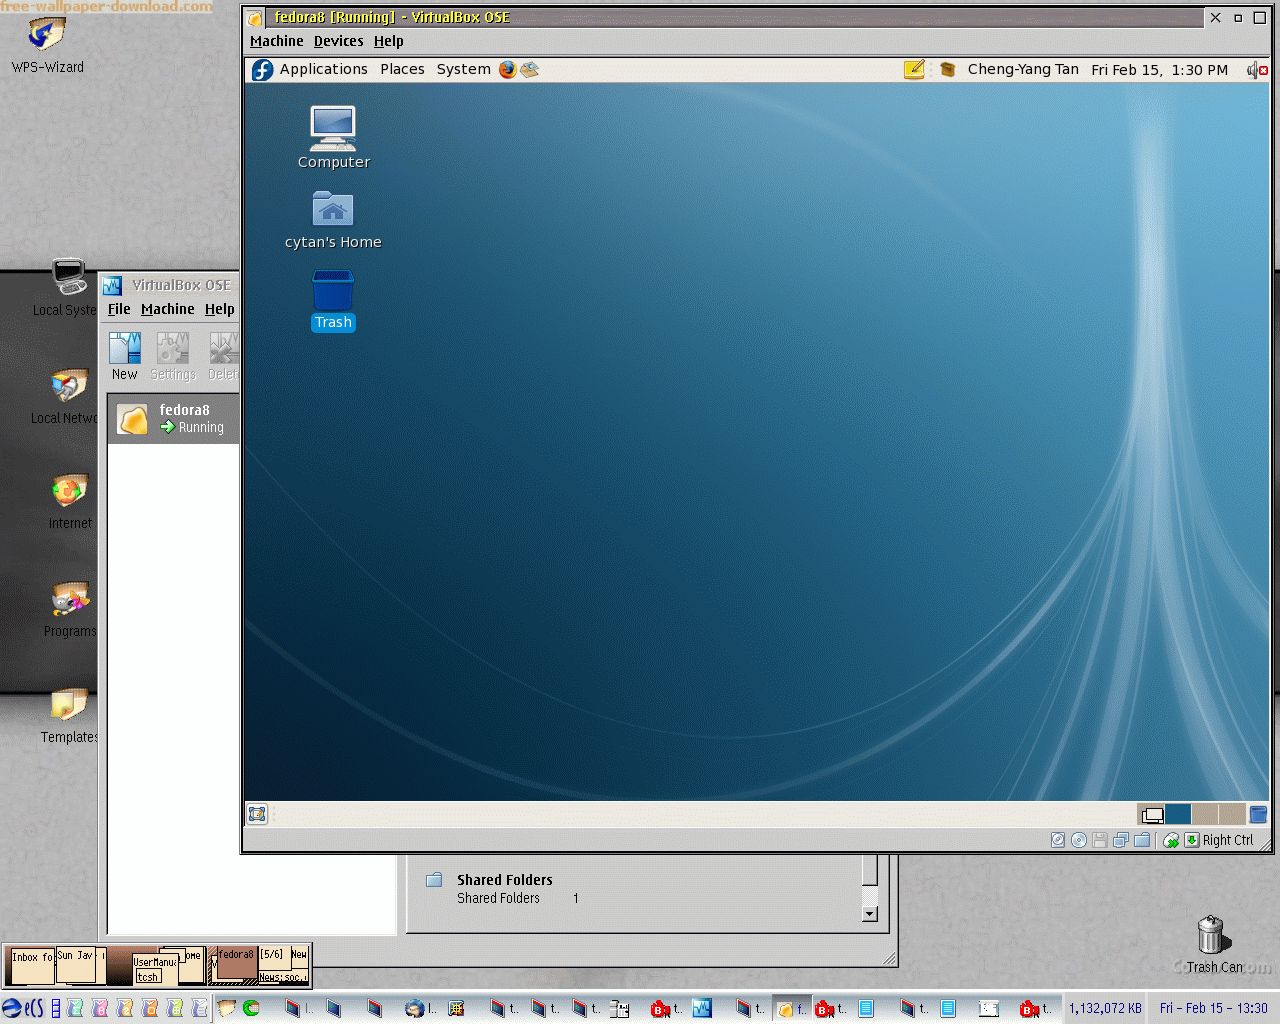
My initial comparison between VBox/2 with Fedora and SVista with RedHat with both running Java 1.6, I have found that VBox/2 is certainly faster than SVista. It is at least fast enough in VBox/2 to be useable. I am quite happy with Paul's build of VBox/2 and encourage other OS/2 and eComstation users to have a go at it. I look forward to the day that VBox/2 has USB and sound support. Even without this support VBox/2 is an important addition to the OS/2 software arsenal.

VBox/2 on the eComstation desktop (Larger image)